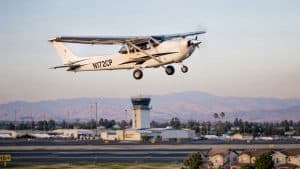
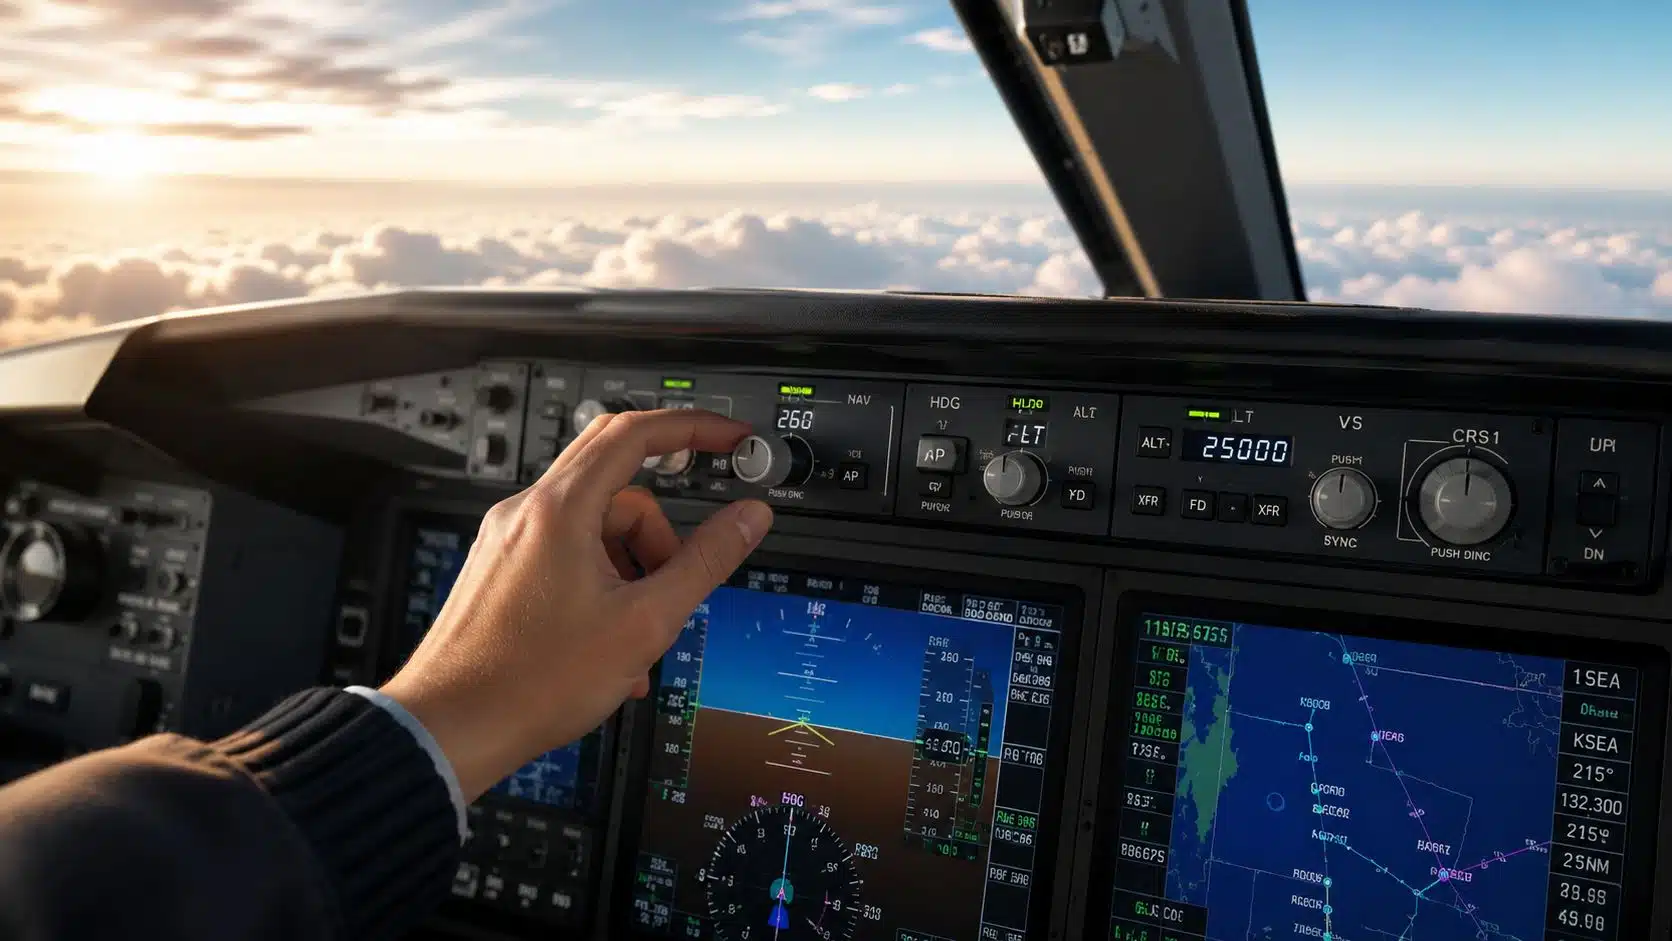
You can be halfway through a scan, watching the airplane track what looks like the right line, and still realize the autopilot isn't flying what you asked for. That's the part most new pilots miss. How to use autopilot well is less about pressing the button and more about catching the mismatch before it turns into a surprise, because the system will often do exactly what it was told, not what you meant.
That's why the best autopilot habit is diagnostic. Decide the target first, verify the mode and source second, and keep the option to take the airplane back by hand at any moment. If you want a quick refresh on recovery discipline, the same mindset applies to a basic unusual attitude recovery review, because the first rule is always to stay ahead of what the airplane is doing. For a surprisingly good way to think about automation as a workflow, not a magic trick, the ShortGenius AI ad generator is a neat example of how structured inputs drive reliable output.
Table of Contents
- The Moment the Autopilot Does Something You Did Not Expect
- Preflight Decisions and the First Engagement
- HDG, NAV, ALT, VS, and APR Explained by Purpose
- Diagnosing Mode Confusion and Source Mismatches
- Autopilot in VFR and IFR Real-World Contexts
- Limitations, Failure Management, and Disengagement
- Practice Plans, Logging, and Training at DuBois Aviation
The Moment the Autopilot Does Something You Did Not Expect
You've got the airplane trimmed, the annunciator looks alive, and the nose is steady. Then the track starts sliding off the plan, not wildly, just enough to make you uneasy. The autopilot isn't broken in that moment, it's telling you something about the way it was set up.
That's the trap. Pilots often think the problem is the machine, when the core issue is that the mode, source, or target was never matched to the task. Microsoft's own description of Autopilot in the Windows world uses the same idea, a collection of technologies rather than a single app, and the aviation version is the same kind of workflow problem, not a single switch problem (Microsoft Autopilot overview).
Start with the target, not the button
A good autopilot session begins with a clear answer to one question, what should the airplane do next? Heading, altitude, course, vertical speed, or an approach capture all work differently, and the autopilot can only follow the value you gave it. If that target isn't set, or if the wrong source is feeding the system, the airplane may still look “on autopilot” while it's flying the wrong idea.
Practical rule: if the airplane isn't doing what you wanted, stop negotiating with the autopilot and fly the airplane.
That's straight from the way experienced pilots treat automation. AOPA's guidance is blunt, don't fight the autopilot, and if it isn't doing what you want, disengage it and hand-fly (AOPA autopilot basics). That's not drama, it's workload management.
Treat every surprise as a setup problem first
The smart pilot checks three things in order, the selected mode, the navigation source, and the aircraft's actual response. If one of those is off, the autopilot may be obedient and still wrong. The habit you want is simple, verify before trust, because trust comes after the airplane proves it's following the correct command.
A lot of student content skips this and jumps straight to button-pushing. The better mental model is that the autopilot is a control layer, not a co-pilot with judgment. You're still the one watching the airplane, the weather, the clearance, and the big picture while the system reduces the small workload in front of you.
Preflight Decisions and the First Engagement
Before the first engagement, decide what the autopilot is supposed to carry and what stays yours. In practice, that means reviewing the available modes in the aircraft, confirming the unit is operating normally, and deciding whether automation even makes sense for the leg you're about to fly. A short local flight in smooth air and a busy instrument segment are not the same job.
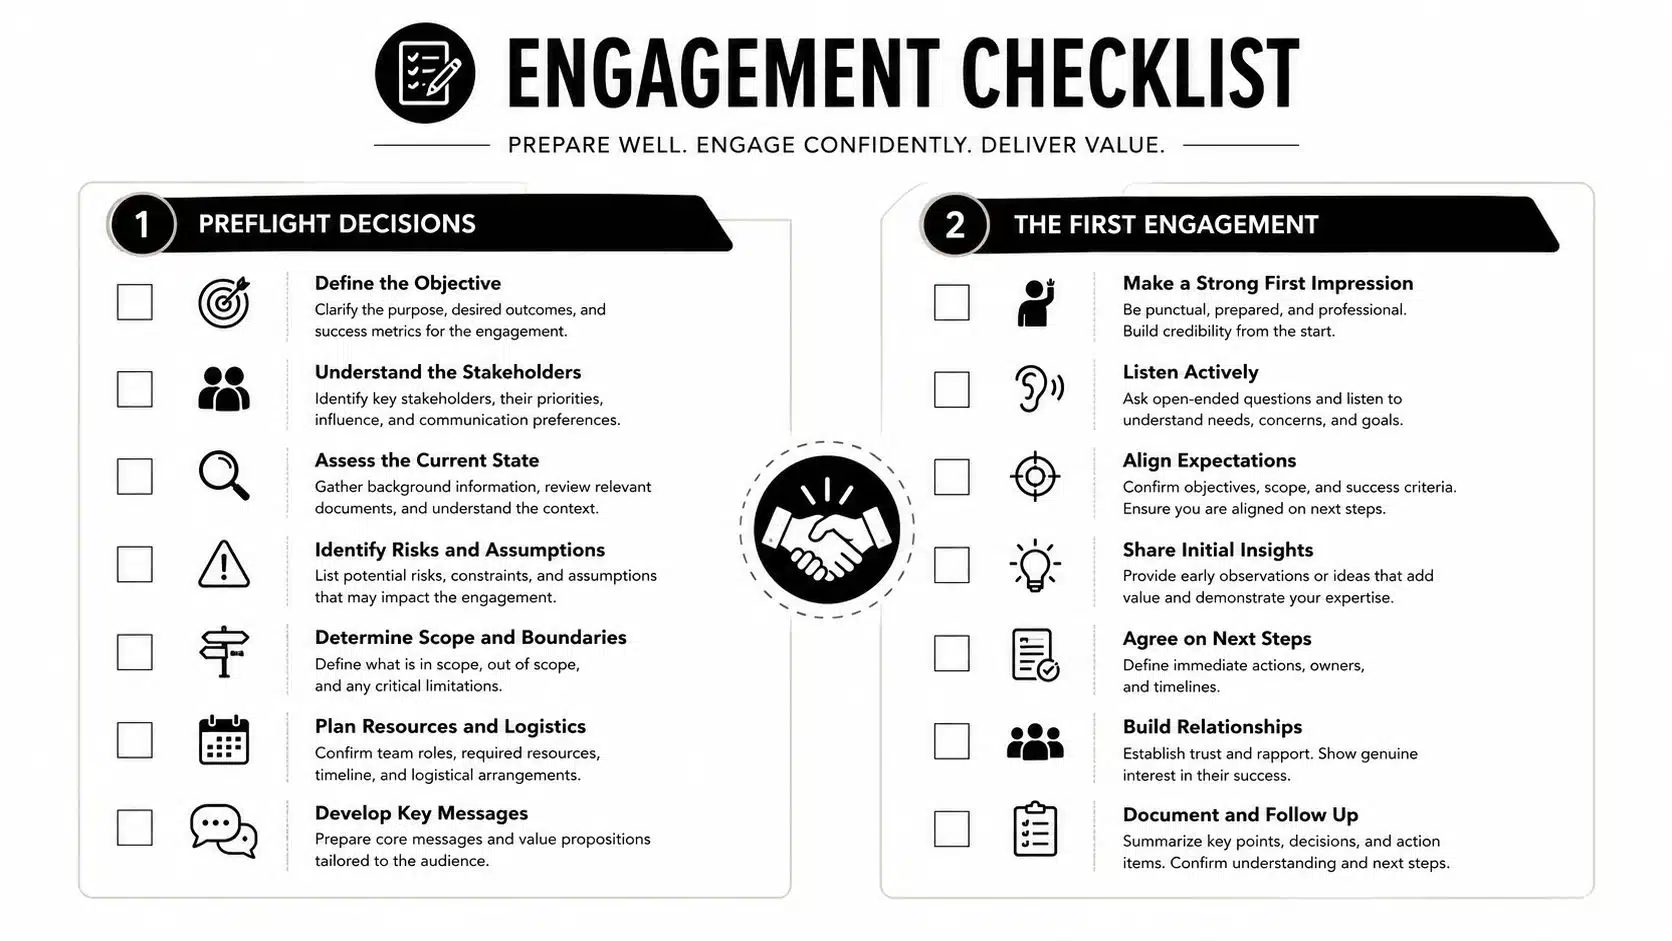
The first engagement goes better when the airplane is already built for success. The heading bug should support the path you expect, altitude preselect should match the clearance or plan, and the navigation source should already be set to what you intend to use. If you wait until after the autopilot is on to fix those basics, you're using the system as a crutch for setup, and that's where beginners get burned.
Make the airplane ready before you press AP
You don't need a long ceremony. You do need a deliberate sequence. The aircraft should be configured so the first commanded mode makes sense right away, not after a correction loop.
- Confirm the system is available: Make sure the autopilot is operating normally before you depend on it.
- Set the intended lateral cue: Put the heading bug where you want the aircraft to go, or load the route if navigation is going to drive.
- Set the vertical plan: If the aircraft supports altitude preselect, match it to the next altitude goal before using altitude capture or vertical modes.
- Verify the source: Know whether the autopilot is following GPS, VOR, localizer, or another input before you trust the track.
- Arm the right expectation: If the airplane should climb, hold, intercept, or approach, choose the mode that matches that job, not the one that merely feels convenient.
The best shorthand is this, don't let the autopilot create the plan for you. You create the plan, and then the autopilot helps execute it. That distinction matters even more in complex training aircraft, which is why a lot of instrument students benefit from a systems-focused review like the one in flight management systems training.
If you haven't built the setup, the first green light doesn't mean much.
The final preflight decision is personal judgment. If you're already overloaded, the autopilot can help, but it can also hide a poor cockpit setup longer than it should. Good pilots use it as a workload tool, not as a substitute for thinking.
HDG, NAV, ALT, VS, and APR Explained by Purpose
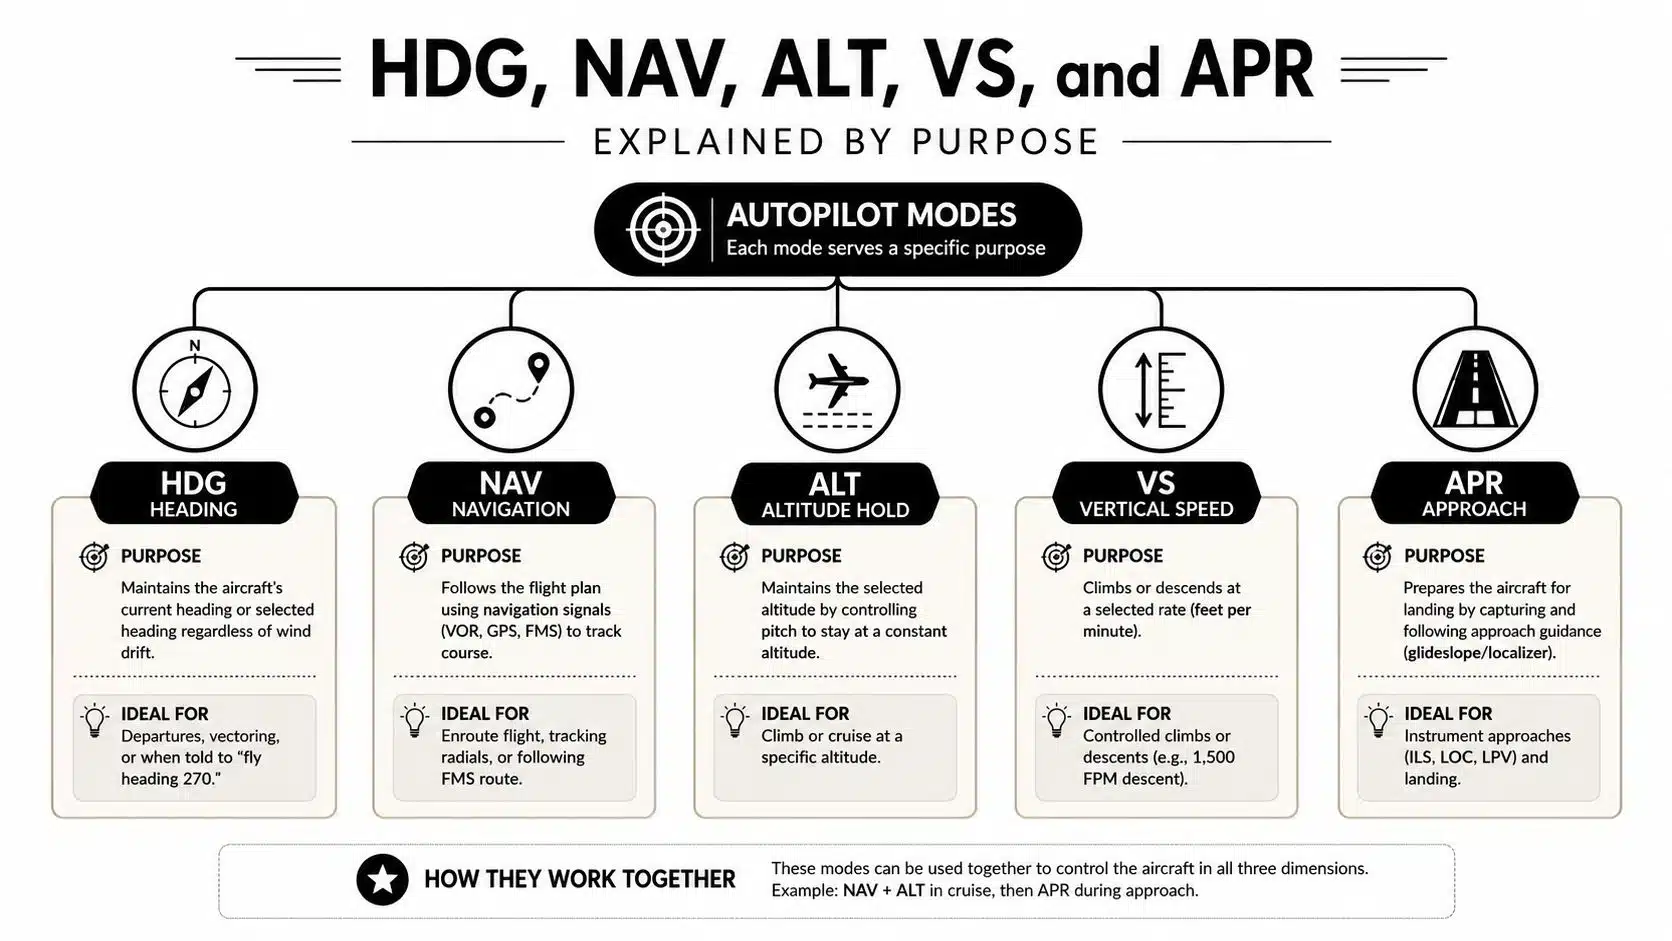
Autopilot modes make sense once you stop treating them like buttons and start treating them like jobs. HDG is a steering aid. NAV is a course-following aid. ALT is a level-off and hold tool. VS is a climb or descent control. APR is approach capture logic.
Think in terms of control intent
HDG holds the heading bug. It doesn't care about the magenta line, the localizer, or whether ATC just gave you a different vector. That makes it useful for short-term steering, vectors, and getting organized, but it won't magically follow a route unless the heading bug is set to support that path.
NAV follows the selected navigation source. That source might be GPS, VOR, or localizer data, depending on how the aircraft is set up. If the source isn't the one you intended, the airplane can track perfectly and still be wrong.
ALT holds pressure altitude. It's the mode that keeps you from wandering after a climb or descent, but it only protects the altitude it was given. VS commands a vertical speed target, which is useful when you need a controlled climb or descent rate, but it doesn't protect against airspeed decay by itself.
APR is not just “final approach mode”
APR is for approach capture and tracking. It's not a casual button for “I'm getting close to the airport.” The mode matters because the autopilot needs the correct approach source and the right intercept geometry, or it may arm correctly while coupling to the wrong thing.
That's why the order matters. You choose the target, then the mode, then you check the annunciator to confirm what the system accepted. If you use approach mode with the wrong source selected, the airplane can do a polished job of flying the wrong signal. For a wider refresher on using navigation properly before approach coupling, see GPS navigation training.
Practical rule: lateral modes and vertical modes can both be active, but each one still needs a source and a purpose that make sense together.
The skill lies not in memorizing what each acronym stands for. It's knowing what job the airplane is trying to do when that acronym lights up. That's what keeps a pilot from getting surprised in the last few miles of an approach.
Diagnosing Mode Confusion and Source Mismatches
Mode confusion is where autopilot beginners get humbled. The airplane looks stable, the panel shows a mode, and yet the track is wrong because the system is driving from the wrong source or the wrong approach logic. IFR Magazine's warning is the right attitude here, verify the correct mode first, set the heading bug, and don't overlook a CDI coupled to the wrong source because it's critical and easily overlooked (IFR Magazine technique article).
The GPS, VOR, LOC, and ILS problem
A common real-world mistake is expecting an ILS capture while the autopilot is still following GPS. Another version is thinking the localizer is armed when the navigation source is still set to the wrong receiver. In both cases, the autopilot may be functioning exactly as designed, just on the wrong information.
The check is simple and disciplined. Look at the CDI source, look at the annunciator, and cross-check the flight plan or tuned frequency against what ATC and the chart say should be driving. If those three don't agree, stop assuming the system is broken.
Trace the deviation back to the setup
When an aircraft drifts off the expected approach path, don't chase the yoke immediately. Start with the source. Was the navigation source changed too early? Was the approach loaded but not activated? Was the wrong mode armed before intercept?
Microsoft's existing-device workflow for Autopilot makes the same general point in a different domain, the process isn't one action, it's a chain of setup steps where missing one stage can block the result (Microsoft existing devices workflow). Aviation automation is similar. The answer is usually somewhere upstream.
Build a cockpit habit that catches the mismatch early
The best pilots scan for source agreement before they relax. If the flight plan says one thing, the CDI says another, and the annunciator is shouting a third, the airplane is giving you a clue that the automation stack isn't aligned.
The warning sign isn't always a wild bank or pitch change. Sometimes it's a smooth, elegant deviation in exactly the wrong direction.
That's the core diagnostic skill. You're not just asking whether the autopilot is on. You're asking whether it's on the right thing, from the right source, with the right mode armed at the right time. Once that habit is automatic, most “autopilot problems” become setup corrections instead of emergencies.
Autopilot in VFR and IFR Real-World Contexts
In VFR, autopilot is mostly a workload saver. It helps on long cross-countries, in smooth air, or when you need a minute to sort radios and nav without letting the airplane wander. It does not replace traffic scanning, sight picture, or the judgment that keeps a pilot from becoming passive on a clear day.
In IFR, the value is different. Single-pilot instrument work loads you up with flying, talking, navigating, and correcting. That's where autopilot becomes practical, because it can hold the airplane while you manage the clearance, the route change, the missed approach setup, or the hold entry.
Use it when it buys you bandwidth
A good IFR climb often benefits from autopilot use once the airplane is stable and configured. The machine can help maintain the selected path while you stay ahead of the next clearance or transition. But the autopilot should still be subordinate to the scan, not a reason to stop scanning.
Busy towered airports make that clear fast. At a place like KCNO, with multiple runways and instrument activity, you need to know when automation is helping and when it's getting in the way. A visual approach in close traffic may be cleaner hand-flown, especially when you're trying to fit into pattern flow and keep the picture outside.
Know when to disengage before the runway environment changes
In good VFR weather, many pilots prefer to disconnect earlier and fly the last segment manually so they stay sharp and connected to the airplane. In IFR, you may keep it on longer, but the moment the setup gets messy, hand flying can be the cleaner choice. The key is not stubbornness, it's workload judgment.
That's where the old rule holds up. The autopilot is there to reduce workload, not to eliminate your role. If it's adding work instead of reducing it, the pilot's job is to make the better choice and take the airplane back.
Limitations, Failure Management, and Disengagement
The safest autopilot users assume it can be wrong. Not broken all the time, just wrong at the worst possible moment. That's why limitation awareness matters as much as mode selection.
What it does not know
The autopilot has no terrain picture and no traffic picture. It also doesn't care about your comfort level if the airplane is being flown at low airspeed or in a high-power, high-drag configuration that demands active management. If the pilot pushes against it, the system can start over-controlling because it's trying to protect the selected mode while the human is fighting for a different outcome.
Altitude alerting also has limits. The system may be perfectly happy until the assigned altitude is reached, then it will capture or level according to its logic, not necessarily according to what the pilot hoped would happen next. That's another reason to stay ahead of the pitch and power picture instead of trusting the box to sort it out.
Disengage early when the cues feel wrong
If the airplane feels unstable, or the autopilot is hunting, mis-tracking, or responding late, the safest move is to disconnect and hand-fly. Keep a hand near the yoke or stick when the weather, workload, or configuration starts changing. Don't wait until you're behind the airplane to decide the automation is no longer helping.
Practical rule: if you're spending mental energy arguing with the autopilot, you're probably better off flying manually.
That's the responsibility split that matters. When the autopilot is on, the pilot controls the autopilot and monitors the airplane. When it's off, the pilot controls the airplane directly. That split appears in standard flight-training material and it's the cleanest way to think about the whole system (Wikipedia on autopilot fundamentals).
Disconnect with intent, not surprise
A good pilot knows what the airplane will feel like when the autopilot lets go. That's the muscle-memory part. You want a calm transition, not a jolt, because surprise is what turns a normal disconnect into a problem.
The core safety habit is simple yet effective. Stay ready, keep your hand in the right position, and treat every mode change as an opportunity to confirm what the airplane is being asked to do.
Practice Plans, Logging, and Training at DuBois Aviation
Autopilot skill comes from repetition, not reading. Start in the simulator with mode transitions, source changes, and intercepts so you can see how quickly a small setup error turns into a wrong response. Then move to the airplane and practice intentional disconnects in safe, controlled phases of flight, because being comfortable with the handoff is part of being good with automation.
Build the skill on purpose
A practical practice plan looks like this.
- Simulator drills: Load routes, change navigation sources, and practice catching mode mismatches before they become track errors.
- Short flight segments: Use autopilot only for cruise or stable en route segments, then disconnect and hand-fly the rest so you stay current.
- Approach reviews: Rehearse source verification and annunciator checks before every instrument intercept.
- Logging discipline: Record the flight with accuracy, using clear notes about what was flown by hand and what was managed with automation.
Be precise in your logbook. Don't blur simulated instrument practice with actual hands-on flight time. Write the session the way you'd want another instructor to read it later, clearly and without guessing.
Train where the workload feels real
A busy towered airport is a good place to build this habit because the radio pace and traffic flow force discipline. That's especially useful when you're learning how to manage an autopilot without getting lazy about the scan. The goal is never to hide behind the automation, it's to use it with enough judgment that you could take over instantly if it drops out.
If you want that kind of training environment, DuBois Aviation offers one-on-one instruction, an in-house simulator, and the kind of busy-airport reality that makes autopilot practice meaningful. Book a lesson, bring your questions, and learn how to use automation without letting it use you.
If you're ready to sharpen your autopilot habits in a real training environment, visit DuBois Aviation to schedule a lesson or discovery flight. Their instructors can help you work through mode awareness, source verification, and hand-flying transitions in the same kind of airspace where those skills matter.