
Private Pilot Maneuvers Guide
Learn the complete steep-turn maneuver from the aerodynamic reason it becomes demanding through setup, sight picture, control pressures, corrections, rollout, and checkride standards. Watch the lesson, study each phase, then take the flow into the airplane with your instructor.
Training at Chino Airport in Southern California • Airplane and helicopter instruction
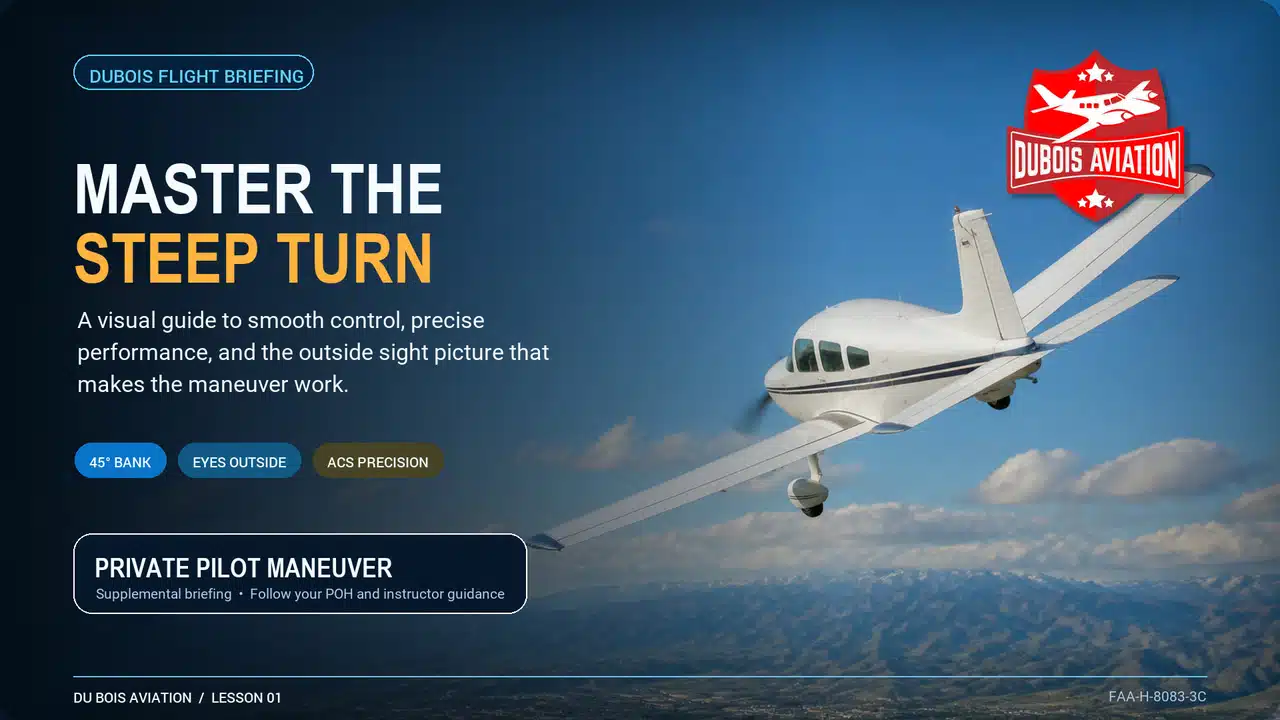
How to Fly a Steep Turn
Follow the maneuver from setup through rollout while listening for the control cues an instructor would use in the airplane.
Private Pilot ACS Standards
FAA-S-ACS-6C calls for a coordinated 360-degree steep turn at approximately 45 degrees of bank, followed by the maneuver in the opposite direction when requested by the evaluator.
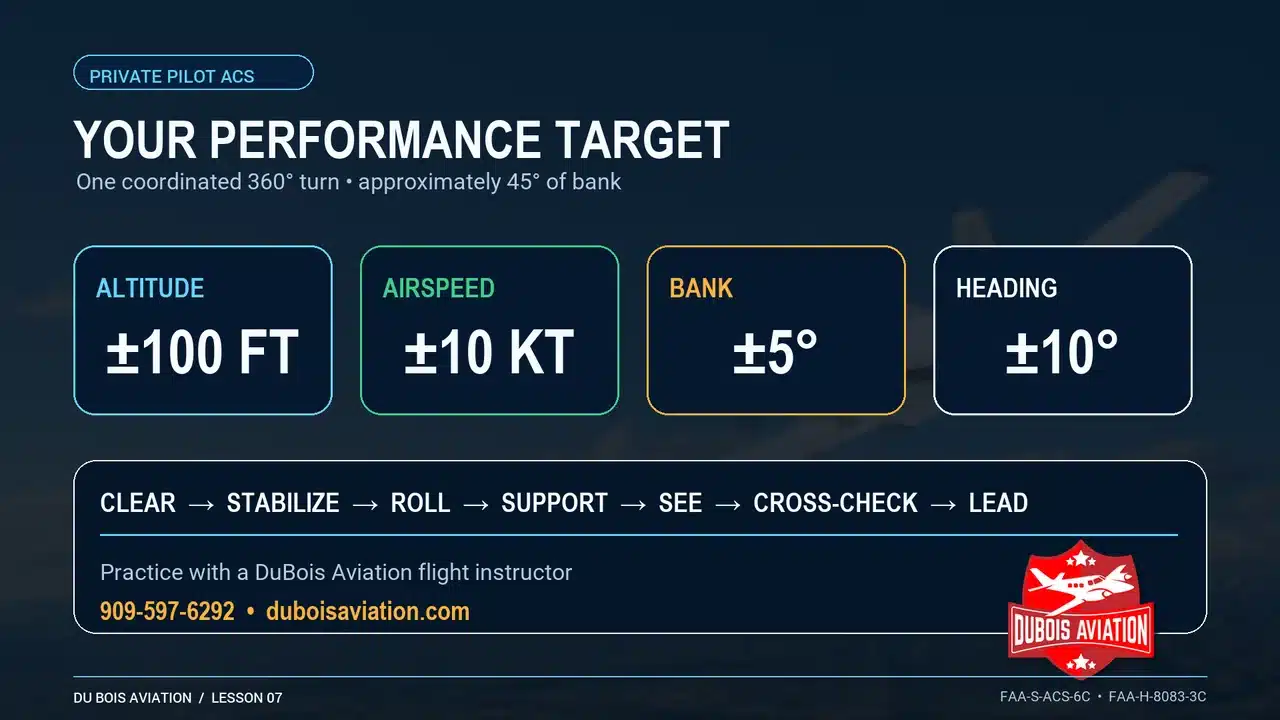
Before you practice: clear the area, use the manufacturer’s recommended entry speed or a speed not exceeding maneuvering speed, follow the POH/AFM, and practice with a qualified flight instructor.
Why a 45-Degree Bank Requires More From the Pilot
A steep turn is not difficult because the airplane suddenly becomes unstable. It becomes demanding because the lift vector tilts, load factor rises, drag increases, and small errors develop quickly.
In straight-and-level flight, lift acts mostly upward and balances the airplane’s weight. When you bank, part of that lift points horizontally and turns the airplane. The remaining vertical component must still support the airplane. To hold altitude, you increase total lift with additional angle of attack, which is why the elevator feels heavier and why the airplane needs extra power to keep the same airspeed.
At 45 degrees of bank in a level turn, the load factor is approximately 1.41 G. The airplane and everyone inside effectively feel about 41 percent heavier. Stall speed also rises with the square root of load factor. A wing that stalls at 50 knots in unaccelerated flight would stall at roughly 59 knots at 45 degrees of bank if altitude is being maintained.
The FAA also describes an overbanking tendency in steep turns. Once the bank is established, the outside wing travels faster and can produce more lift than the inside wing. The airplane may try to continue rolling into the turn, so a small amount of opposite aileron may be needed to hold the selected bank.
| Level bank angle | Approximate load factor | Approximate stall-speed increase | What the pilot notices |
|---|---|---|---|
| 0° | 1.00 G | None | Normal cruise control pressure and stall margin. |
| 30° | 1.15 G | About 7% | A modest increase in back pressure may be needed. |
| 45° | 1.41 G | About 19% | Noticeably more back pressure, drag, and attention to bank control. |
| 60° | 2.00 G | About 41% | Load and stall speed rise sharply; this is beyond the private pilot target. |
The practical takeaway: bank angle, pitch, and power are connected. If the bank steepens while you keep pulling, load factor and stall speed rise together. Correct the bank trend early instead of trying to save altitude with more elevator.
See the Maneuver Before You Chase the Instruments
A strong steep turn starts with a stable airplane and a useful outside reference. Smoothly build the bank, support the added load factor, and use short instrument checks to confirm what the horizon is already telling you.
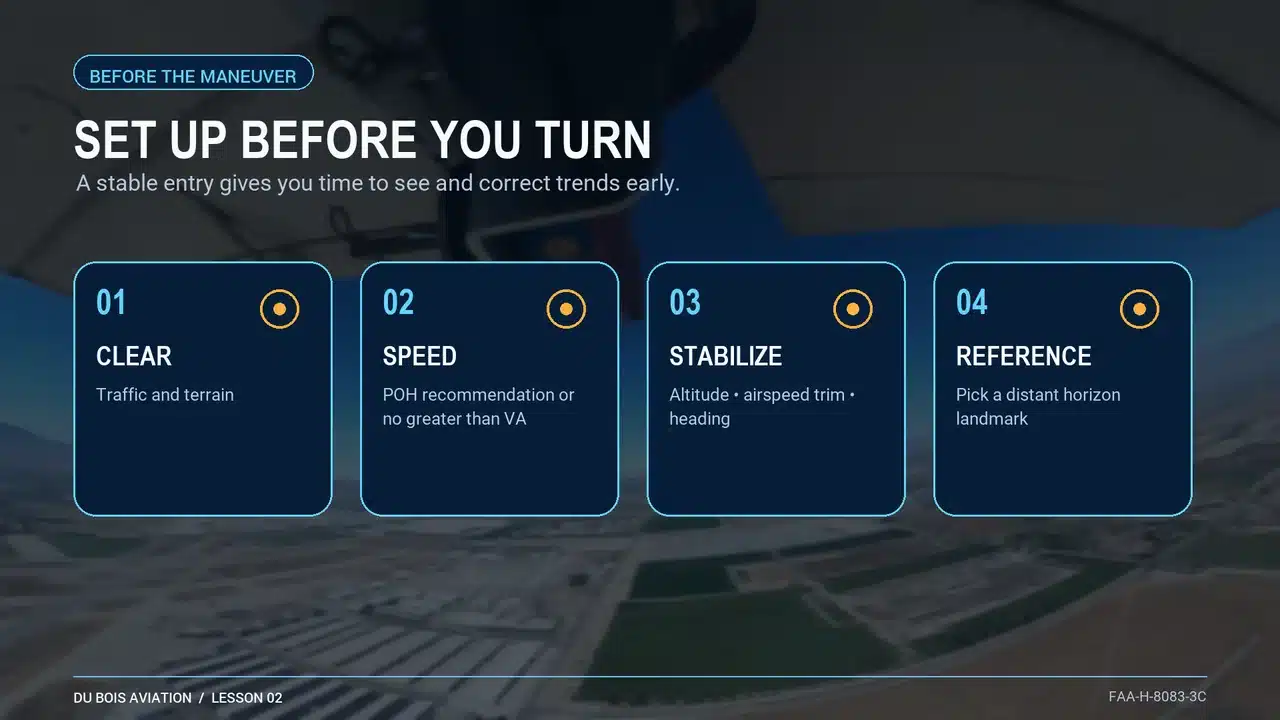
Set Up Before You Turn
Clear for traffic and terrain, establish the recommended entry speed, stabilize altitude and heading, and choose a distant landmark for rollout.

Roll, Support, and Coordinate
Use coordinated aileron and rudder. As the bank passes roughly 30 degrees, increase back pressure to support lift and add only the power your airplane needs.

Fly the Outside Sight Picture
Keep most of your attention outside. Hold the relationship between the nose, wing, and natural horizon, then use quick instrument checks for bank, altitude, airspeed, and coordination.

Look Through the Rollout
Lead the entry heading by about 20 to 25 degrees as an initial visual cue, then adjust for your airplane and turn rate. Relax back pressure and remove any added power as the wings level.
What to Do During Every Part of the Turn
Think of the maneuver as four connected phases. Each phase gives you a chance to identify a trend before it becomes an ACS-sized deviation.
Before the Roll-In
Complete clearing turns, choose an altitude with a safe margin, set the POH-recommended entry speed, stabilize heading and altitude, and select a distant reference. Brief which direction you will turn first and what you will do if traffic appears.
Build the Bank Smoothly
Use coordinated aileron and rudder. As the bank passes about 30 degrees, begin adding the back pressure needed to keep the nose from dropping. Add only enough power to hold entry airspeed. Arrive at 45 degrees without overshooting it.
Hold the First Half
Let the natural horizon provide most of the attitude information. Use a quick scan of bank, altitude, airspeed, and the inclinometer to confirm the trend. Avoid staring at the altimeter until the airplane drifts away from the sight picture.
Look Across the Back
As the nose passes through the back half of the turn, shift your attention toward the rollout landmark. The bank may try to steepen, so hold it with a small opposite-aileron pressure while staying coordinated.
Lead the Rollout
Use 20 to 25 degrees of lead as an initial training cue for a 45-degree bank, then refine it for the airplane and turn rate. Begin the rollout while looking through the windshield toward the target, not after the target disappears under the nose.
Return to Level Flight
Coordinate the rollout, release the added back pressure as the wings level, and remove the power or trim added for the turn. Re-establish the entry altitude, airspeed, and heading without a balloon or dive.
Use a trend scan, not a number chase. Look outside, check bank, check altitude, check airspeed, and return outside. If altitude begins to fall because the bank has steepened, reduce the bank slightly before adding more elevator. If altitude rises while the bank is shallow, restore the bank and relax the extra back pressure.
Left and right turns may not feel identical. Torque, P-factor, seating position, sight picture, and your own control habits can make one direction easier. Practice both until your setup, scan, and rollout timing are repeatable in either direction.
Common Steep-Turn Errors
Do not wait for a large deviation. Recognize the first trend, make a small correction, and let the airplane respond.
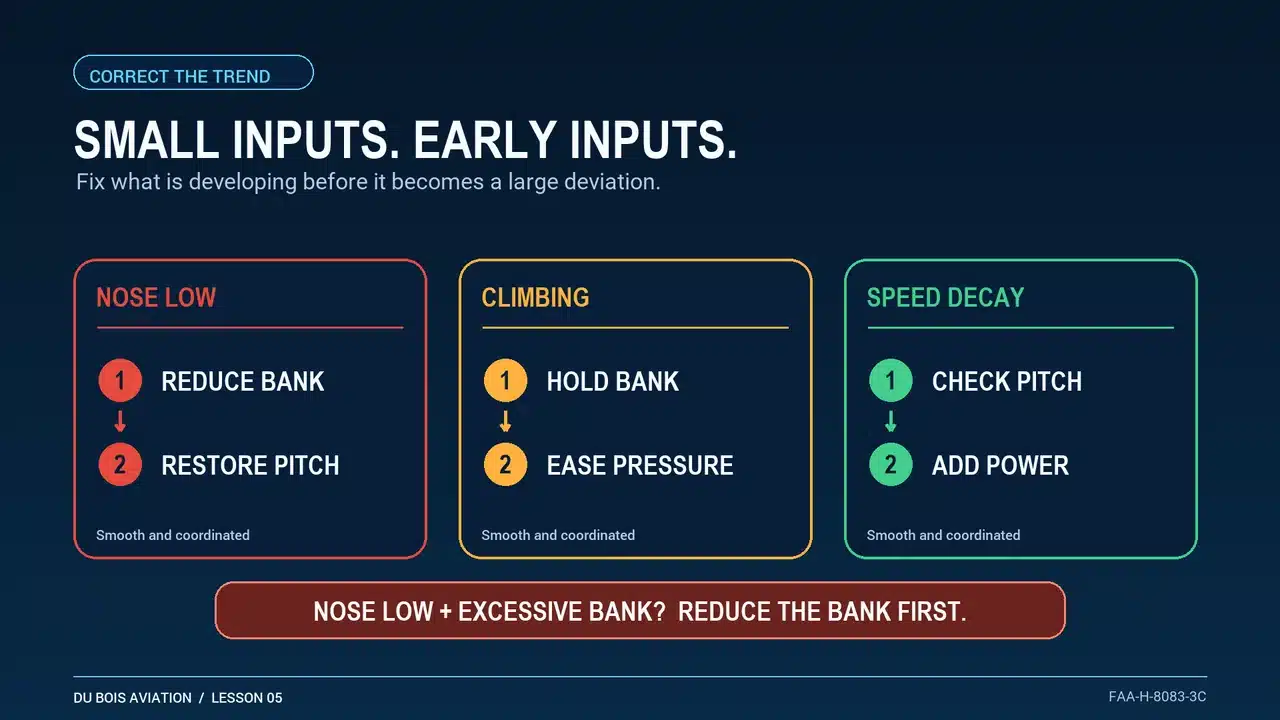
Altitude falling
If excessive bank is driving the nose down, reduce the bank first, restore the sight picture, and smoothly return to the desired bank.
Altitude climbing
Confirm the bank is not too shallow, then ease excessive back pressure while maintaining coordination.
Airspeed decaying
Check pitch attitude and power. Avoid pulling harder while allowing the airplane to become slow and overbanked.
Late rollout
Look through the turn toward your landmark and begin the rollout before reaching the entry heading.
How to Present the Maneuver to an Examiner
A strong practical-test steep turn looks planned, coordinated, and calm. The examiner should see that you are managing risk and aircraft energy, not simply trying to keep four needles inside tolerance.
Start with a short briefing: identify the maneuver, clearing plan, entry altitude and airspeed, direction of the first turn, visual reference, and recovery plan. Use the airplane’s checklist and POH or AFM. Before rolling, verify that the area remains clear and that you have adequate altitude.
During the turn, verbalizing every instrument is unnecessary and can pull your attention inside. Fly the sight picture, make short cross-checks, and state only information that helps demonstrate judgment, such as identifying traffic or explaining a correction. If the airplane starts to drift, correct early and smoothly. A small correction shows control; a large late correction shows that the trend went unnoticed.
| Phase | What a prepared applicant does | Common weak habit |
|---|---|---|
| Brief | Names the maneuver, direction, entry speed, altitude, reference, and safety plan. | Begins turning before the setup and clearing scan are complete. |
| Enter | Uses coordinated controls and arrives smoothly at about 45 degrees of bank. | Snaps into the turn, overbanks, and immediately chases altitude. |
| Maintain | Uses the horizon as primary information and instruments to verify trends. | Fixates inside and loses the outside attitude picture. |
| Correct | Makes small bank, pitch, or power corrections as soon as a trend begins. | Pulls harder without correcting an excessive bank angle. |
| Roll out | Looks through the turn, leads the heading, and removes added inputs as the wings level. | Waits for the entry heading and rolls out late with excess pitch or power. |
| Repeat | Stabilizes before beginning the turn in the opposite direction. | Rushes directly into the second turn while still correcting the first. |
If the maneuver becomes unsafe: discontinue it, return to coordinated level flight, clear the area, and reset. Sound judgment is always more important than forcing a maneuver to continue.
Private Pilot Maneuver Roadmap
Use this roadmap to connect each maneuver to the practical skill it develops. More DuBois visual lessons will be added to this guide.
Steep Turns
Coordination, outside references, load factor, bank control, and precise rollout.
Slow Flight
Precise airplane control at high angle of attack and low airspeed.
Power-Off Stalls
Recognition and recovery in an approach-to-landing configuration.
Power-On Stalls
Recognition and recovery in a departure-style configuration.
Ground Reference Maneuvers
Rectangular courses, S-turns, and turns around a point using changing wind correction.
Normal, Short-Field, and Soft-Field
Directional control, rotation, obstacle planning, and energy management.
Normal, Short-Field, and Soft-Field
Stabilized approaches, aiming point control, touchdown accuracy, and crosswind technique.
Forward Slips and Go-Arounds
Manage excess altitude safely and make an early decision to discontinue an unstable approach.
Emergency Approach and Landing
Airspeed, landing-area selection, checklist discipline, planning, and cockpit priorities.
Basic Instrument Maneuvers
Maintain control and navigate safely when outside visual references are unavailable.
Steep-Turn Questions Students Ask Most
Use these answers to organize your chair-flying, then confirm the exact technique and speeds for your airplane with your instructor and POH or AFM.
Should I use trim during a steep turn?
The FAA does not require one universal trim technique. Some pilots use a small amount of nose-up trim to reduce control force; others hold the pressure manually. If you add trim, remember to remove it during rollout so the airplane does not pitch up as the wings level.
Why do I keep losing altitude?
The most common cause is allowing the bank to steepen and then trying to solve the problem only with elevator. Reduce an excessive bank slightly, restore the outside sight picture, and then return smoothly to the target bank.
How much power should I add?
Use the amount the airplane needs to hold the selected entry airspeed. The exact change depends on aircraft type, weight, density altitude, and entry speed. Add it smoothly as bank and back pressure increase, then remove it during rollout.
Why is one direction harder?
Engine effects, your seating position, the outside sight picture, and personal control habits can make left and right turns feel different. Use the same setup and scan in both directions and practice the weaker direction with an instructor.
Can I practice steep turns by myself?
Use this guide for preparation, not as a substitute for instruction. Learn and practice the maneuver with a qualified flight instructor, use the current POH or AFM, select a safe practice area, and follow all applicable regulations and training standards.
Official References
This guide supplements, but does not replace, instruction in the aircraft. Review the current POH/AFM and train with your instructor.
Fly With a DuBois Aviation Instructor
Train at Chino Airport with an instructor who can help you turn the visual cues in this guide into consistent aircraft control.