
You're flying on an IFR clearance, the approach is loaded, and you're already thinking about the descent. Then ATC says the words that make a lot of instrument students tense up: expect holding.
If that moment still feels abstract, you're not alone. A lot of pilots can recite a definition of a hold but still feel overloaded when they have to copy the clearance, picture the pattern, choose the entry, manage the airplane, and stay ahead of the radios. That's why the right question isn't just what is a holding pattern. The better question is, what is it doing for you, for ATC, and for the traffic around you?
A good hold is not random circling. It's a disciplined, predictable maneuver that keeps you in protected airspace until the system is ready for you. Once you understand the shape, the logic, and the corrections, the task gets much less intimidating.
Two practical options worth comparing
These are specific products pilots commonly compare for this type of flying. Confirm compatibility with your aircraft and instructor before ordering.
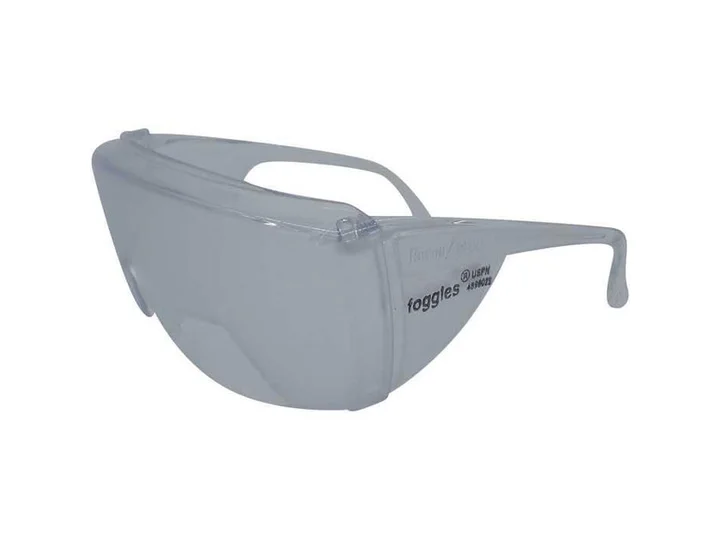 Instrument trainingFoggles Aviation IFR Training GlassesCheck current availability on Amazon (paid link)
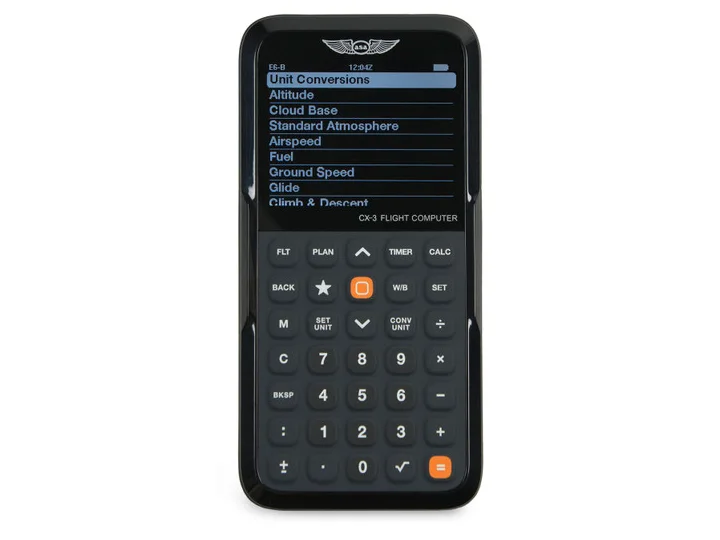 Flight planningASA CX-3 Flight ComputerCheck current availability on Amazon (paid link)
When Your Flight Path Becomes a Waiting Game
You're inbound on an instrument flight plan, the weather is down, and several airplanes are arriving at the same airport. The controller's voice comes through the headset with a calm instruction that changes your next few minutes completely. Hold as published. Expect further clearance.
That's the moment many students first realize that a holding pattern isn't some academic maneuver buried in instrument training. It's a working tool. Air traffic control uses holds to manage congestion, weather delays, and runway problems in an orderly way so airplanes can wait safely instead of improvising.
Historically, holding pattern came into broader English from aviation, where it described aircraft “awaiting clearance especially to land,” and the phrase later became a general metaphor for stalled progress, as noted by Dictionary.com's entry on holding pattern. In everyday conversation, it means not moving forward. In the cockpit, it means the opposite of chaos. It means structure.
Why pilots need to get comfortable with holds
A hold is one of those maneuvers that exposes whether a pilot is managing workload or just keeping up. You have to listen, think, brief, configure, and fly with precision. That's why instrument training programs such as Du Bois Aviation's IFR rating training include holds as a core skill, not a side topic.
A hold is a delay procedure, but it should never feel like delayed thinking. The airplane needs a plan before it reaches the fix.
Students often get confused because the phrase sounds passive. It isn't. The pilot is actively maintaining position, timing, course guidance, airspeed discipline, and situational awareness. If you treat it like “just waiting,” you'll fall behind quickly.
What a hold really means in practice
From the pilot's seat, a hold usually means one of these situations:
- Traffic is backed up: ATC needs spacing before the next approach sequence.
- Weather is affecting arrivals: Aircraft may need to wait for improving conditions or rerouting.
- A runway or approach isn't immediately available: The system still needs you in a known, protected place.
That's why mastering the hold matters well beyond a checkride. A pilot who can fly one smoothly is easier for ATC to work with, easier on passengers, and much safer in busy instrument conditions.
The Anatomy of a Holding Pattern
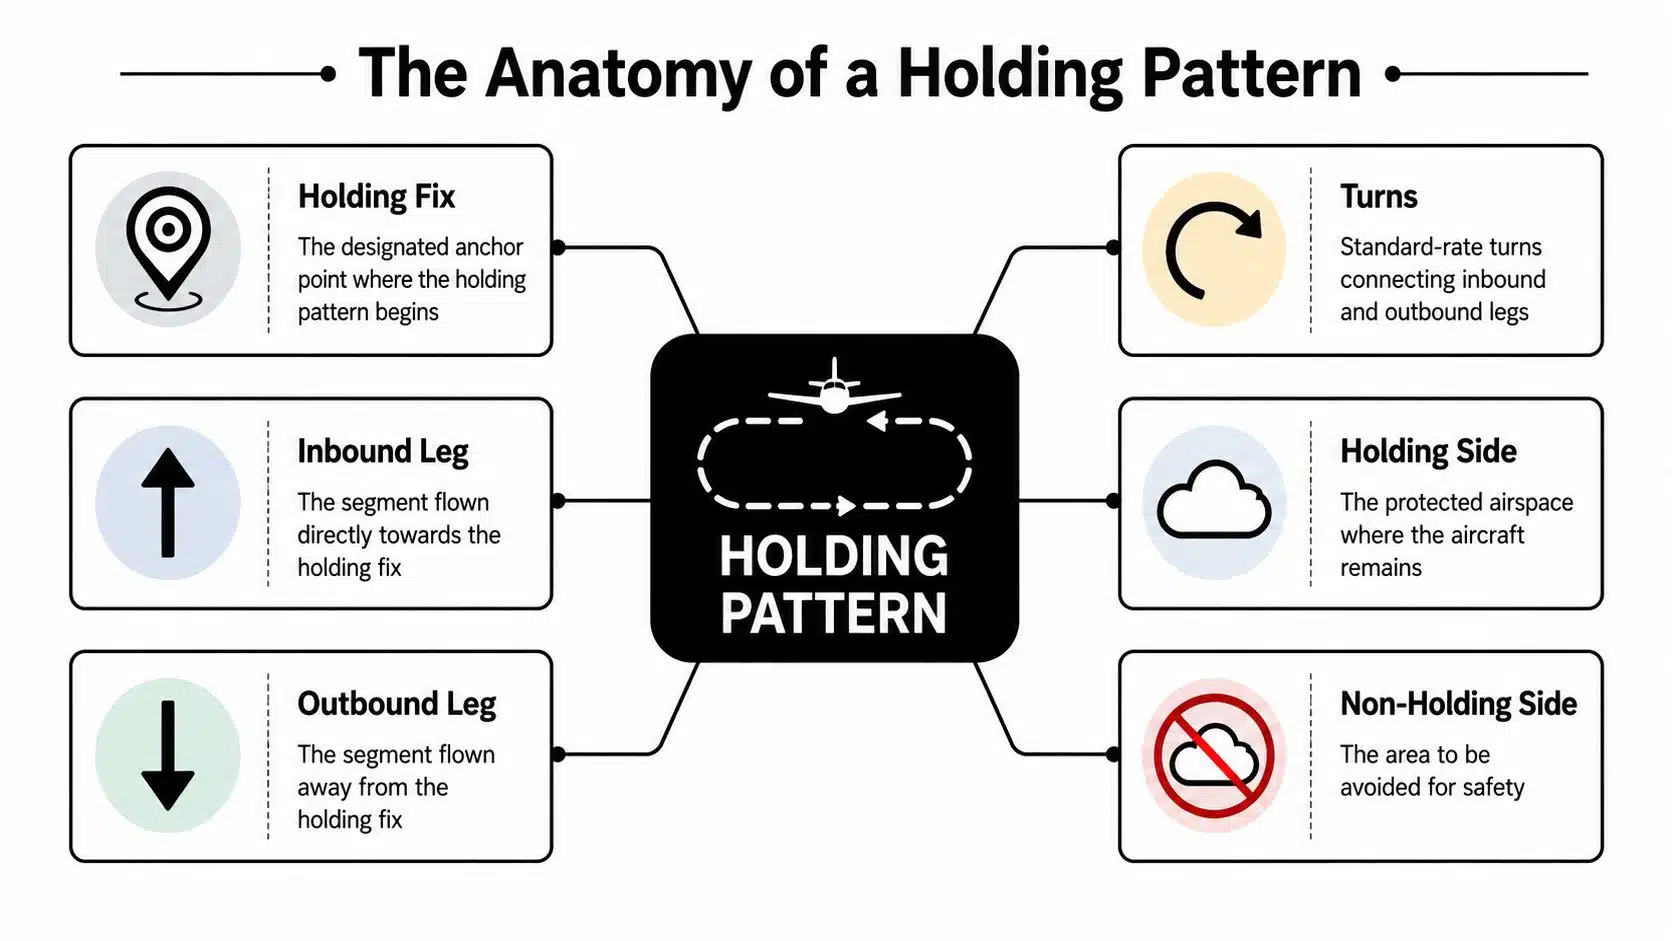
A holding pattern is easiest to understand when you stop thinking of it as “circling” and start thinking of it as a racetrack anchored to one point. In instrument aviation, it's a standardized racetrack-shaped delay procedure tied to a defined fix, built around a timed inbound leg and two 180-degree turns, and when ATC assigns a hold at an uncharted fix, the holding direction from the fix must be specified, as described in this explanation of holding procedures.
The parts you must picture instantly
Every hold has a few basic pieces:
- Holding fix: This is the anchor point. It might be a VOR, intersection, waypoint, or another defined fix.
- Inbound leg: This is the segment flown toward the fix on the assigned holding course.
- Outbound leg: This is the segment flown away from the fix after crossing it.
- Two turns: These connect the inbound and outbound legs and create the racetrack shape.
- Holding side: This is the protected side of the pattern where the aircraft is intended to remain.
- Non-holding side: This is the side you avoid except as needed during a proper entry.
If you can draw those six parts from memory, you already understand more than many early instrument students think they do.
Standard versus non-standard turns
A standard hold uses right turns. If ATC or a chart doesn't say otherwise, expect right turns.
A non-standard hold uses left turns. That's one of the first places students get tripped up because they focus on the inbound course and forget to confirm turn direction. Turn direction changes how the protected side sits relative to the fix, which changes both your mental picture and your entry choice.
Practical rule: Before you worry about the entry, identify three things first. The fix, the inbound course, and the turn direction.
Why precision matters
Holds are standardized for a reason. The geometry is designed so ATC can keep multiple airplanes separated in predictable airspace. Your job is not to invent a creative oval. Your job is to fly the assigned pattern closely enough that everyone stays where the system expects them to be.
That's also why turn technique matters. If your bank control is sloppy, your rollout will be sloppy, and the entire hold starts to drift. A strong understanding of standard-rate turns in instrument flying helps a lot because holds are built on repeatable turn performance, not guesswork.
The mental model that helps most students
Think of the hold as a loop with one “home base” point. Each time you cross the fix, you reset the same sequence:
- Cross the fix.
- Turn to the outbound side.
- Fly outbound.
- Turn back.
- Intercept and fly inbound.
- Cross the fix again.
That repetition is what makes a hold manageable. Once the first circuit is under control, the next ones become a rhythm problem, not a mystery.
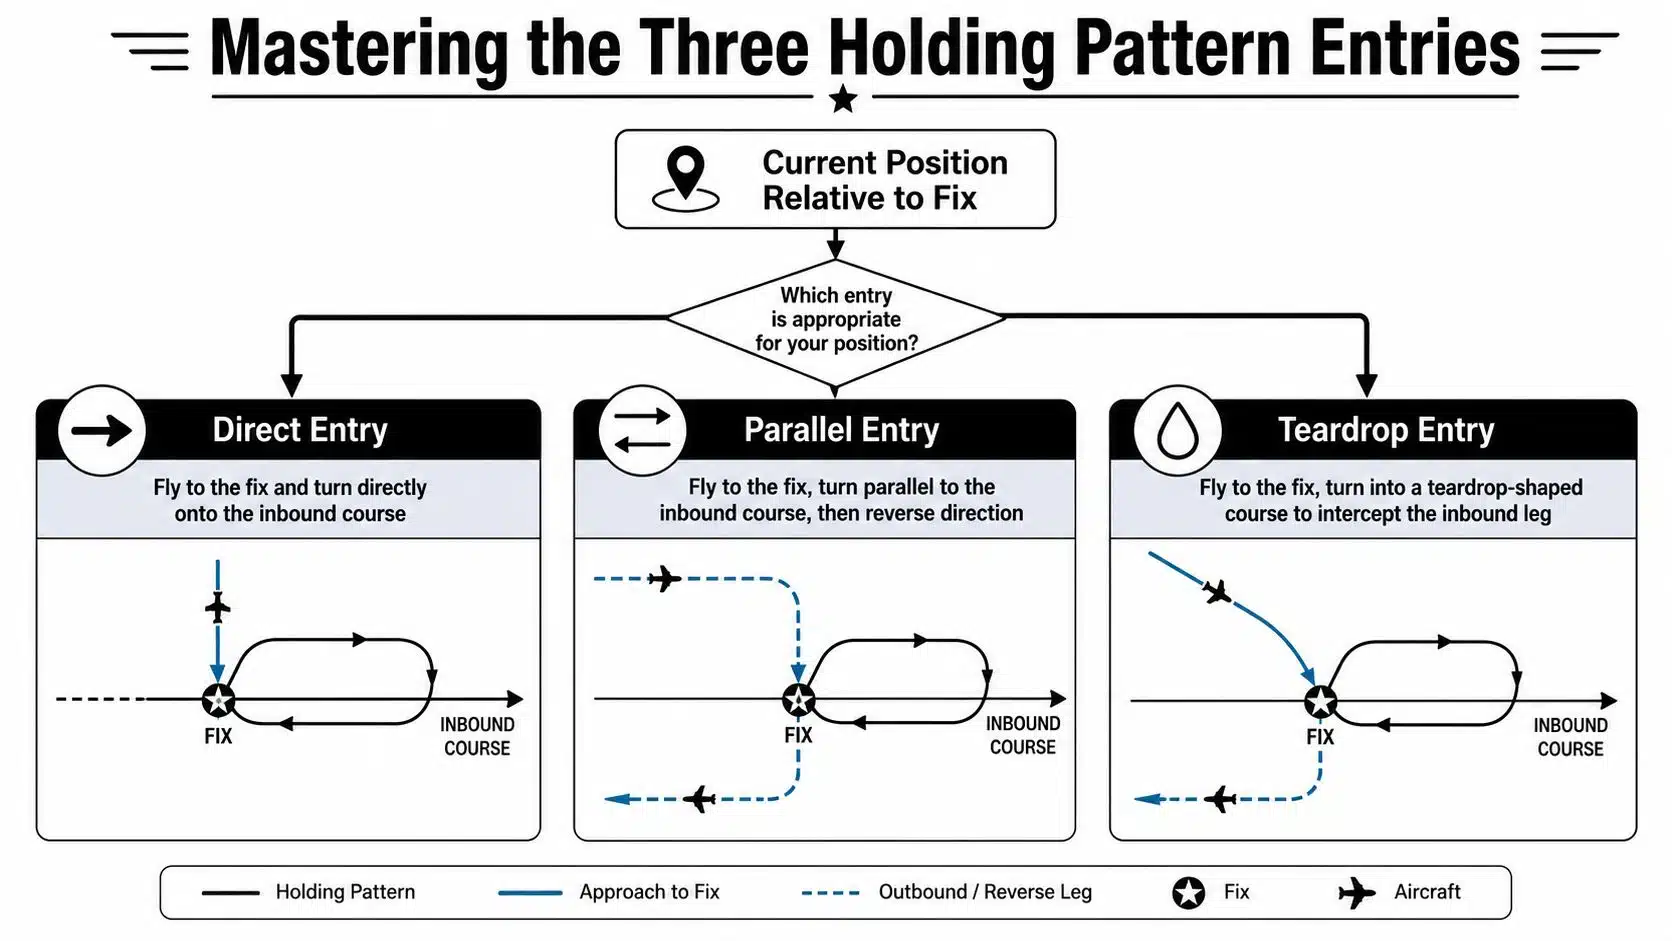
Mastering the Three Holding Pattern Entries
Most of the stress around holds comes from the first lap, not the second or third. Students usually aren't worried about flying a racetrack. They're worried about entering the right racetrack from the heading they currently have.
That's where the three standard entries come in: direct, parallel, and teardrop.
Start with a simple cockpit flow
When ATC assigns a hold, many students try to solve the entry before they've built the picture. Reverse that habit. Use this sequence instead:
- Write the clearance clearly
- Identify the fix
- Mark the inbound course
- Confirm right or left turns
- Visualize the holding side
- Compare your present heading to that picture
Only then should you choose the entry.
A lot of pilots use a thumb method on the chart or a quick HSI sketch. Others rotate the heading bug and mentally divide the sectors. The exact memory aid matters less than consistency. Pick one method and use it every time, especially in training.
Direct entry
A direct entry is the least dramatic. You cross the fix and turn in the direction needed to join the hold normally.
This entry works when your approach to the fix already places you in a favorable position relative to the holding side and inbound course. If your current path lines up well with crossing the fix to join the pattern, direct is usually the cleanest option.
Students often overcomplicate direct entries because they assume “simple” means “too easy to be right.” Don't do that. If the geometry says direct, fly direct.
Parallel entry
A parallel entry feels strange the first few times because you intentionally fly a segment that is parallel to the inbound course on the non-holding side after crossing the fix. Then you turn back around to intercept the inbound leg and join the hold.
This entry is useful when your arrival at the fix would make an immediate turn into the hold awkward or unsafe from a positioning standpoint. The temporary move to the non-holding side is part of the approved procedure, not a mistake.
Here's where students get in trouble. They hear “parallel” and then forget the next step. Parallel is not the hold. It's a way to get established into the hold.
If you can say the sequence out loud, you'll usually fly it better: cross the fix, parallel outbound, turn back, intercept inbound, join the pattern.
Teardrop entry
A teardrop entry sends you outbound on a course offset into the holding side before you turn back to intercept the inbound leg. It smooths out the transition when your arrival heading would otherwise create an awkward intercept angle.
Many instrument students like teardrop once they understand it because it feels more natural than parallel. The airplane moves into the protected side early, and the geometry often looks cleaner on the instrument display.
The mistake here is making the teardrop too aggressive. If you dive off into a huge unsupported arc, you defeat the point of a standardized entry. Keep it disciplined and intentional.
How to get faster at choosing the right entry
If you're still slow on entries, that's normal. Speed comes from repetition, not from forcing it.
A few methods help:
- Pause the airplane mentally first: Before the fix, stop chasing every knob and button. Build the picture.
- Use a simulator session: Repetition in an instrument rating simulator lets you practice entry decisions without the pressure of bumps, radios, and traffic.
- Call your shot: Say “I expect a parallel entry” before reaching the fix. Verbalizing the plan exposes confusion early.
- Draw tiny sketches: A fast pencil sketch on a kneeboard often beats trying to hold the entire picture in working memory.
The test is not whether you can memorize sectors on the ground. It's whether you can choose an entry while aviate, direct the plane, and communicate are all happening at once.
How to Fly and Correct the Hold in Practice
A hold becomes manageable when you reduce it to a repeatable cockpit task. First, understand the clearance. Then configure early. Then fly each lap as a correction problem, not a perfection problem.
A typical ATC clearance might sound like this in structure: hold north of a fix, on a specified course or radial, with right or left turns, and sometimes with an expect-further-clearance time. Your job is to decode the fix, the inbound course, and the turn direction immediately. Everything else flows from that picture.
Timing and speed discipline
Standard pilot guidance commonly uses 1 minute inbound and outbound legs at or below 14,000 feet MSL, and 1.5 minutes above 14,000 feet MSL. Common civil holding speed limits in the U.S. and Canada are 200 KIAS up to 6,000 feet MSL, 230 KIAS from 6,001 to 14,000 feet MSL, and 265 KIAS at 14,001 feet MSL and above, according to Skybrary's holding pattern reference.
If a pilot forgets to slow before the fix, the rest of the hold gets harder fast. The airplane covers more ground, the turns widen, and staying in protected airspace becomes more difficult.
Standard Holding Speeds and Leg Timings
| Altitude (MSL) | Max Speed (KIAS) | Leg Time |
|---|---|---|
| Up to 6,000 feet | 200 | 1 minute |
| 6,001 to 14,000 feet | 230 | 1 minute |
| 14,001 feet and above | 265 | 1.5 minutes |
Wind correction is where the hold gets real
No-wind holds look great on a whiteboard. Real holds don't.
If the wind pushes you off the inbound course, correct inbound first. Once you see the drift needed to stay centered inbound, many pilots use the practical rule of applying roughly triple that drift correction outbound. The reason is simple. The outbound leg is where the wind has more time to move you away from the protected shape before you turn back inbound.
For example, if you need a modest correction inbound to stay on course, expect a larger correction outbound to avoid being blown wide. You don't need a perfect first guess. You need a deliberate correction, then a refinement on the next circuit.
Cockpit reminder: Fix the inbound leg first. A neat outbound track means nothing if you can't return to the fix on course.
What to scan in each lap
A good hold scan is compact. Don't bounce around the panel randomly.
Use a simple rhythm:
- Crossing the fix: Start timing at the right moment and confirm the outbound turn.
- Outbound: Set heading, hold altitude, watch trend, and anticipate wind drift.
- Turning inbound: Roll out with enough correction to capture the inbound course smoothly.
- Inbound: Track precisely, manage power, and prepare for the next crossing.
If you have DME or GPS-based leg guidance, that can help define leg length. If you have an autopilot or FMS hold function, that can reduce workload. But those tools don't replace pilot understanding. Automation helps only if the pilot knows what the airplane is trying to do and can recognize when it's doing the wrong thing.
Common Holding Errors and How to Fix Them
Every instrument student makes mistakes in holds. The trick is learning to diagnose the mistake quickly instead of turning one bad lap into three.
The encouraging part is that holding errors are usually predictable. They come from the same few weak points over and over: poor setup, rushed entry decisions, speed control problems, and weak wind correction.
Error patterns instructors see all the time
- Choosing the wrong entry: This usually happens because the pilot didn't build the full picture before reaching the fix. Fix it by identifying fix, inbound course, and turn direction before deciding anything else.
- Crossing the fix too fast: A pilot who delays slowing down often ends up with overshoots and wide turns. Fix it by getting configured before the fix, not after.
- Late timing: Students sometimes forget when timing starts or become distracted by the first turn. Fix it with a verbal callout at fix passage.
- Scalloping inbound: This is the classic back-and-forth overcorrection on the inbound leg. Fix it by making smaller, earlier heading changes and evaluating trend instead of reacting late.
What the mistakes feel like from the seat
One reason holds frustrate students is that the error often appears one step after the cause. A wide inbound intercept may have started with too much outbound drift. A bad second turn may have started with excess speed before the first crossing. You have to learn to look one link earlier in the chain.
A hold usually falls apart quietly. The first clue is often small: rushed notes, an uncertain picture, or one missed callout.
That's why debriefing matters. Don't just say, “That lap was messy.” Ask what specifically drove the mess. Did you lose the picture, mishandle speed, or fail to account for wind?
Fast corrections that actually work
A few practical resets help immediately:
- Redraw the hold on your kneeboard if your mental picture is fading.
- Fly the inbound leg cleanly first before trying to perfect the outbound side.
- Reduce cockpit chatter during the first lap. Too much talking can bury the basics.
- Use standard callouts at fix crossing, outbound timing, and inbound intercept.
Students often think they need more complicated technique. Usually they need a calmer setup and better discipline on the basics.
How Du Bois Aviation Trains for Holds at KCNO
The first place many pilots really learn holds isn't in the clouds. It's in repetition. The procedure has to become familiar enough that the pilot can still perform while copying a clearance, listening for traffic, and managing the airplane.
At Chino, students work in the kind of environment where holds make practical sense. KCNO is a busy, towered airport, so instrument training naturally includes real radio discipline, sequencing awareness, and strong cockpit organization. That matters because a hold flown in quiet airspace feels very different from a hold flown while managing a realistic traffic flow.
Building skill from low pressure to high workload
A useful progression starts on the ground and in simulation. There, students can pause after a clearance, sketch the hold, choose an entry, and repeat the procedure until the sequence feels natural. Once the basic rhythm is stable, the airplane adds what simulation can't fully replicate: motion, distraction, radio timing, and the need to stay ahead in real time.
That training flow is one reason pilots often improve faster when they don't treat holding as a one-off checkride item. It's better learned as part of instrument workload management.
A school such as Du Bois Aviation, operating at Chino with airplane and helicopter training, simulator access, and instrument instruction in a towered environment, can expose students to that progression in a practical setting.
Why live ATC experience changes the lesson
In a busy training environment, the hold stops being a diagram and starts becoming a communication exercise. The pilot has to hear the clearance correctly, read it back accurately, and then fly it without drifting behind the airplane.
This video gives a sense of that training environment and cockpit mindset:
A student who has practiced holds with active ATC in a towered setting usually develops a calmer response to the unexpected. That's the primary payoff. Not memorizing a diagram, but being able to manage delay safely and professionally when the plan changes.
Beyond the Hold How to Buy Your First Airplane
For a lot of pilots, confidence in instrument flying opens a new door. The next thought isn't just about the next rating. It's about ownership. Maybe it's a first airplane for personal travel, time building, family trips, or having an aircraft that fits your mission better than a rental schedule does.
The safe way to buy an airplane starts with one question. What mission are you trying to fly? A weekend local flyer, an IFR cross-country machine, and a primary trainer are not the same purchase. If you skip that step, it's easy to buy too much airplane, too little airplane, or the wrong maintenance profile for your budget and experience.
The non-negotiables in a safe purchase
- Define the mission clearly: Be honest about runway length, passenger load, weather use, and typical trip distance.
- Get a true pre-purchase inspection: Use a trusted A&P mechanic who knows the aircraft type and works for you, not the seller.
- Review the logbooks carefully: Missing records, inconsistent entries, or vague maintenance history should slow you down.
- Check training and insurance fit: Some airplanes are easy to insure and transition into. Others require more planning and dual instruction.
- Don't ignore helicopters if that's your path: The same core rule applies. Mission, maintenance history, and independent inspection come first.
A careful purchase process protects more than money. It protects safety, dispatch reliability, and your confidence in the aircraft from day one. The same mindset that makes a pilot good in holds also helps during a purchase. Slow down, get organized, verify the facts, and don't let excitement rush the decision.
If you're working toward instrument proficiency, planning your next rating, or thinking about aircraft ownership, DuBois Aviation offers flight training, simulator access, and rental resources at Chino Airport that can support that next step.


