
You're probably in one of two places right now. Either you're working on your instrument rating and approach plates still look like dense, cryptic diagrams, or you already have the rating and know that flying a published approach well is very different from merely flying one legally.
At Chino, that difference shows up fast. You can taxi out in clear skies, launch into a realistic training environment, and a few minutes later be managing radios, briefing a plate, crossing fixes, and deciding whether to continue or go missed. That's where instrument approach procedures stop being abstract FAA language and become cockpit skills.
I teach these procedures the way I'd teach them in the airplane or simulator. Plain language first. Then structure. Then repetition until the chart starts to feel less like a puzzle and more like a route you can fly with confidence.
Why Every Pilot Needs Instrument Approach Procedures
A private pilot without instrument skills is often at the mercy of a low cloud layer, haze, or reduced visibility. A pilot who understands instrument approach procedures has another option. They can work inside a structured system designed to guide an aircraft from the IFR environment to a runway, even when the runway doesn't appear until late in the approach.
That matters because most real-world flying doesn't happen in perfect blue-sky conditions. Even in Southern California, marine layer mornings, smoke, haze, and changing ceilings can turn a routine trip into a no-go for a VFR pilot. For the instrument pilot, the question becomes less emotional and more procedural: Which approach is available, what equipment do I need, and can I fly it safely?
The system behind the chart
The FAA doesn't leave this to improvisation. The United States Federal Aviation Administration operationalizes these standards through 14 CFR Part 97, which prescribes the standard instrument approach procedures for civil airports and the specific weather minimums applicable to landings under Instrument Flight Rules (FAA Part 97).
That sentence sounds legalistic, but the cockpit meaning is simple. The approach chart in your hand is a standardized, published procedure. The altitudes, courses, fixes, and minimums aren't suggestions. They are the framework that keeps you separated from terrain and obstacles while giving ATC and pilots a common playbook.
Why students get stuck here
Most students don't struggle because the flying is impossible. They struggle because the amount of information arrives all at once.
You're trying to interpret the plan view, load the procedure, brief frequencies, identify the FAF, think ahead to the missed approach, and keep the airplane under control. That's normal. IFR training feels busy before it feels orderly.
Practical rule: A good instrument pilot doesn't try to “wing” an approach. They fly a published plan, stay ahead of the airplane, and already know what they'll do if the runway never appears.
What this changes in your flying
Instrument approach procedures increase the usefulness of your certificate in a very practical way:
- They create predictability: You know where you'll descend, level, configure, and decide.
- They support safer decision-making: If conditions aren't right, the missed approach is already built into the procedure.
- They improve precision: You stop making up descents and start flying defined paths.
- They build confidence: Repetition turns workload into routine.
For a student pilot training over Chino, that's the payoff. You're not memorizing charts to pass a checkride. You're learning how to fly a three-dimensional route with discipline when outside references are limited and cockpit organization matters most.
The Anatomy of an Instrument Approach
You are inbound to Chino in the clouds, ATC clears you for the approach, and the chart in front of you has to turn from ink on paper into a sequence of actions. That is the moment this section matters. An instrument approach is built in segments, and each segment answers a cockpit question: Where do I start, when do I descend, what must I cross, and what do I do if the runway never shows up?

Once you break it into parts, the procedure stops feeling crowded. For a Du Bois Aviation student flying a Jeppesen chart in the simulator or in the school's aircraft over KCNO, that matters. You are not trying to memorize a page. You are learning the order in which the approach unfolds.
The entry onto the procedure
The approach begins where you get established legally and correctly. That point is often an Initial Approach Fix, or IAF.
The IAF works like the front gate to the procedure. From there, everyone starts from a known place, at a known altitude, on a known course. That structure keeps you from improvising your way toward final, which is exactly what IFR procedures are designed to prevent.
In the cockpit, preparation has to be complete. In a G1000 or GTN-equipped trainer, the approach should already be loaded and verified. In a round-dial trainer, you should already have frequencies set, courses identified, and altitudes marked where your eyes can find them fast. Over Chino, where training traffic can keep the pace up, being late here usually means you stay behind the airplane for the rest of the approach.
The segment that sets up the rest
After the initial segment, the procedure transitions into the intermediate segment. Here, the approach starts to narrow your world. Headings, altitudes, and course guidance bring you closer to final and give you time to stabilize the airplane before the most demanding part begins.
Students often treat this portion as empty space because nothing dramatic seems to happen. In practice, a good approach is built here. If power is still wandering, if the airplane is too fast, or if the nav source is not what you expected, the final segment gets busy in a hurry.
A useful way to check yourself here is to ask a short set of cockpit questions:
- Am I on the correct navigation source
- Is my altitude matched to the chart and clearance
- Is the airplane configured the way I planned
- Do I know which fix starts the final segment
- Can I state the missed approach from memory well enough to begin it immediately
That last question catches a lot of students. If you have not thought through the missed approach before the FAF, you are postponing a decision until your workload is highest.
The final approach segment
The final approach segment is where the procedure carries you from being lined up to being in a position to land, if the required visual references appear. This is the part students usually picture first, but it only works well when the earlier segments were flown with discipline.
On a procedure with vertical guidance, you intercept a published descent path and follow it down. On a non-precision approach, the final segment typically begins at the Final Approach Fix, or FAF, and you descend using the published restrictions and your planned profile. The chart tells you where descent begins. Your job is to cross that point configured, briefed, and ready.
In training at Du Bois Aviation, Jeppesen symbology starts paying off. The briefing strip, profile view, and minima box are not separate pieces of information. They are one picture of the same event. You are crossing a specific fix, at a specific altitude, with a specific course and a specific plan if the runway environment is not there by minimums.
The point where the approach becomes a decision
Every instrument approach contains a decision point. At some published location, the procedure stops being an arrival path and becomes a choice.
That point is the Missed Approach Point, or MAP.
If you see the required visual references and the airplane is in a position for a safe landing, you continue. If not, you execute the missed approach exactly as published. There is no extra credit for waiting a little longer or drifting below minimums to search. In IFR flying, discipline at the MAP protects you from the urge to hope your way onto the runway.
The missed approach segment
The missed approach is the procedure's built-in escape plan. It is published before you need it because the time to invent one is not at low altitude, in weather, while reconfiguring the airplane.
Students often spend most of their effort getting down to minimums. Smart instrument pilots give equal attention to climbing away. In the simulator at Du Bois Aviation, that is why missed approaches get repeated until the sequence feels automatic, especially when ATC issues instructions quickly or the airplane is still accelerating and cleaning up.
A clean missed approach usually follows this order:
- Power and attitude first. Stop the descent and establish a positive climb.
- Configuration next. Retract flaps and gear on schedule for the aircraft you are flying.
- Track the published procedure. Fly the heading, course, and altitude you were assigned or published.
- Talk after the airplane is stable. Advise ATC once control is solid.
That order matters. Aviate still comes first.
When you study an approach this way, the plate becomes easier to use in real time. It is a sequence with logic. Start here, get established, stabilize, descend, decide, then either land or fly the published exit. That is the anatomy of the procedure you will fly over Chino.
Decoding Approach Types Precision vs Non-Precision
Not every instrument approach gives you the same kind of help. That's one of the first distinctions an instrument student has to understand, because the chart may look similar while the actual workload in the cockpit feels very different.
Instrument Approach Procedures are categorized by ICAO into three types: Precision Approach, Approach with Vertical Guidance, and Non-Precision Approach (ICAO approach categories overview). The easiest way to understand the categories is to ask one question: does the procedure guide you laterally only, or laterally and vertically?
The three families in plain English
A Precision Approach gives you left-right guidance and up-down guidance. The classic example is an ILS. If you're flying the ILS or LOC RWY 26L into Chino and you're on the ILS side of that procedure, you're following a lateral course and a glideslope.
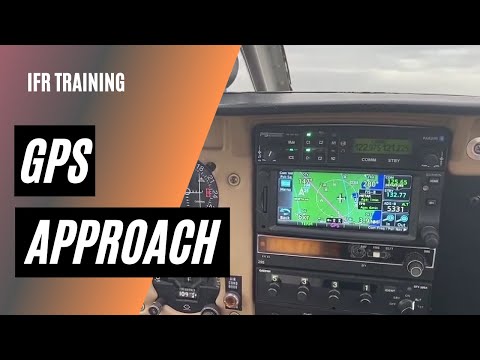
An Approach with Vertical Guidance, often called APV, also gives you a defined vertical path, but not through the same ground-based precision system as an ILS. A GPS-based approach with LPV-style guidance is the common student example. At KCNO, the RNAV (GPS) RWY 26L is a useful way to think about how modern avionics can provide a very stable descent picture.
A Non-Precision Approach gives lateral guidance only. VOR, localizer-only, and some LNAV procedures fit here. You still have a published path to the runway environment, but you manage descent using altitudes and disciplined timing rather than following a glideslope.
Comparison of Instrument Approach Categories
| Category | Guidance Provided | Common Examples | Typical Minimums |
|---|---|---|---|
| Precision Approach | Lateral and vertical guidance | ILS | Generally the lowest available on the field |
| Approach with Vertical Guidance | Lateral and vertical guidance | LPV, some RNAV procedures with vertical guidance | Often near precision-style minimums |
| Non-Precision Approach | Lateral guidance only | VOR, LOC, LNAV | Usually higher than precision-style approaches |
What this means in the airplane over Chino
If I'm teaching a newer instrument student at Chino, I usually expect the most immediate stability on a procedure with vertical guidance. Why? Because the airplane can follow a predictable descent path rather than asking the student to calculate and monitor each descent segment manually.
That doesn't mean non-precision work is less important. In fact, it often reveals whether a student understands energy management. If you fly a localizer-only or VOR-style approach, you can't rely on the glideslope needle to solve poor planning.
A simple way to compare the workload:
- Precision Approach: Best for seeing how a stable, coupled or hand-flown vertical path should feel.
- APV: Excellent bridge between legacy procedures and modern GPS flying.
- Non-Precision Approach: Strong test of situational awareness, altitude discipline, and briefing quality.
How to choose wisely
In actual flying, the “best” approach depends on three things.
First, weather. If ceilings and visibility are lower, a precision or APV procedure may offer the most practical path if your aircraft and pilot qualifications support it.
Second, equipment. A chart may be available, but that doesn't mean your airplane is authorized or equipped to fly every version of it.
Third, proficiency. A pilot who hasn't flown a raw-data localizer or VOR approach in a while shouldn't pretend that legal equals sharp.
Fly the approach that fits the weather, the aircraft, and your current skill level. If those three don't line up, choose something simpler or don't go.
How to Read and Brief an Approach Plate
You are being vectored toward Chino in the clouds. SoCal Approach is talking fast, the airplane is a little ahead of you, and the Jeppesen plate on your lap looks busy. In that moment, the plate cannot be a page full of random symbols. It has to work like a cockpit script. It tells you what matters now, what matters next, and what you will do if the runway never appears.

At Du Bois Aviation, this is usually the point where a student stops seeing the chart as clutter and starts seeing order. We teach that shift by dividing the plate into a few predictable areas and reading them in the same sequence every time. The habit matters in the Archer, in the Cessna, and in the simulator, because pressure tends to shrink your attention. A repeatable scan keeps you from chasing the wrong detail.
Start at the top and orient yourself
Many students look at the middle of the page first because the plan view feels like the "map." In the cockpit, that often leads to rushing. The safer move is to begin at the top and confirm what procedure you are about to fly.
The header answers the first set of questions. Which approach is this. Which runway does it serve. Which frequencies, identifiers, and final approach course belong to it. If ATC says "RNAV Runway 26R," but your avionics are set up for another variant or another runway, the error starts here.
A good first scan checks:
- Approach title: Confirm the type of procedure and the runway.
- Airport name and identifier: Verify you are looking at KCNO, not a nearby field.
- Primary nav data: Check frequencies, identifiers, and inbound course.
- Notes: Catch any special requirements before workload rises.
That takes only a few seconds once the habit is built.
Read the plate in layers
The plate works like a highway map paired with an altitude script.
The plan view gives you the overhead picture. You use it to understand where the fixes sit, how you will join the approach, whether there is a course reversal or hold-in-lieu, and how the procedure is shaped around terrain and airspace.
The profile view tells you how the vertical story unfolds. Through the profile view, many students finally see the approach as a sequence instead of a sketch. You can track the altitudes you must respect, identify the final approach fix, and see how the missed approach begins. If the plan view tells you where to drive, the profile view tells you which hills you must clear and when to start down.
Then come the minimums. Students sometimes treat that box like the last thing to glance at. I teach the opposite. Minimums define the finish line. They tell you which line applies to your equipment, your category, and your type of guidance, and they set the exact point where you either continue visually or execute the missed approach.
Use a briefing flow you can repeat under pressure
A briefing should be short enough to use in real time and complete enough to keep you out of trouble. Fancy wording is less important than a stable order. If your flow changes every lesson, you will miss items when the radios get busy over Chino.
Here is a practical sequence we use with instrument students:
Name the approach clearly
Say the full title and confirm it matches the clearance, chart, and avionics.State how you expect to join
Will you start from an IAF, get vectors to final, or need a course reversal?Describe the final approach segment
Brief the inbound course, FAF, descent path or stepdowns, and the kind of guidance available.Review the minimums you will use
Say the correct minimums for your setup and what visual reference is required to continue.Brief the missed approach out loud
Heading, altitude, first fix, and any hold. If the plate depicts a hold and that part feels rusty, review how holding patterns and entries work before the flight so the published miss does not become a surprise.Catch the special notes
Any crossing restriction, equipment note, or local item that could change how you fly the procedure.
One simple test works well. If you finish the briefing and still cannot say the first two steps of the missed approach from memory, the briefing is incomplete.
Why the plate deserves that level of respect
These procedures are engineered, checked, and published so pilots can fly them predictably when outside visual cues disappear, as noted earlier in the article. Your job is to fly the chart you have, not the one you meant to brief.
That mindset changes how you handle altitudes and notes. A crossing restriction is not decoration. A missed approach instruction is not a backup detail for later. In actual IFR, especially for a student pilot, those items are part of the procedure's safety margin.
Make the chart easier to learn before the airplane starts moving
Students learn this material in different ways. Some need to trace the procedure with a finger. Some need to say the briefing out loud. Some need to chair-fly the sequence in the sim until the page feels familiar. If visual structure helps you retain complex material, Tutorial AI's visual learning guide offers a useful explanation for why diagrams, patterns, and repeated visual cues help many learners hold onto approach information.
In Du Bois Aviation training, that often means marking a simple path through the plate before engine start. Top of the chart first. Then plan view. Then profile. Then minimums. Then missed approach. The order stays the same so your attention does not wander when the workload rises.
A Chino-specific briefing mindset
At KCNO, your briefing needs to match the pace of the place. You are not briefing from a quiet desk with all afternoon to study the chart. You are briefing in a real cockpit, with radio calls, traffic, configuration changes, and the normal pressure of staying ahead of the airplane.
So keep the brief practical. Answer the questions that matter in the next few minutes of flight:
- Which runway and procedure am I set up for
- How am I joining it
- What is my next protected altitude
- Where do I need to be configured and stabilized
- What are my minimums
- What do I do immediately if I go missed
That is the standard to aim for in training over Chino. A good approach brief is not a speech. It is a usable script that helps you fly the procedure correctly, catch errors early, and stay calm when the workload spikes.
Mastering Approaches at Du Bois Aviation
Most students don't master instrument approach procedures by reading about them. They master them by repeating the same decision chain until it becomes familiar under pressure. That's why local training matters. When you fly repeatedly in and around Chino, the airport stops feeling like a random location on a chart and starts becoming a working IFR classroom.

Where most students should begin
The first clean approach often happens in the simulator, not the airplane. That's a good thing.
In the simulator, you can pause after a poor setup, repeat a missed approach, or re-fly the same segment until the sequence clicks. You can practice loading a procedure, tracking inbound, crossing the FAF stabilized, and flying the published miss without worrying about taxi, turbulence, or real traffic compressing your time.
For pilots who want a structured way to rehearse those sessions, the instrument rating simulator training option is one practical way to build that repetition before adding the full workload of the airplane.
A local training story
A typical Chino-area student starts with the mechanics. Keep headings tight. Track courses properly. Don't chase needles. Learn what a stabilized intercept feels like.
Then the next layer gets added. Brief the approach while handling radios. Confirm the navigation source change. Start the descent on time. Call minimums without sounding surprised that minimums exist.
After that, the missed approach stops feeling like a failure and starts feeling like another maneuver. That's a major turning point in IFR training. Students gain confidence when they realize a go-around under IFR is not an emergency. It's the published next step.
Matching the aircraft to the lesson
Aircraft choice affects learning. A stable trainer gives a student more spare attention for interpretation and planning. A faster aircraft exposes weaknesses in setup and timing much sooner.
That's why training progression matters. A student might first develop strong habits in a forgiving platform, then apply the same habits in something that demands more anticipation. The skill isn't “flying a certain airplane.” The skill is staying ahead of the airplane no matter what you're flying.
A useful local syllabus often includes variety:
- Precision-style work at Chino: Good for learning stable vertical guidance and clean callouts.
- RNAV practice nearby: Helpful for avionics management and modern IFR workflow.
- Non-precision approaches in the area: Good for altitude discipline and raw interpretation.
- Missed approach repetition: Essential for confidence when the landing doesn't happen.
Students improve fastest when they stop treating each approach as a separate event and start seeing the repeated pattern underneath all of them.
Bringing the simulator lesson into the airplane
Once the basic flow is solid, the airplane adds realism. Things happen quicker. ATC may shorten the setup. Turbulence makes precise needle control harder. A slightly unstable descent becomes more obvious.
That's where the training starts to feel real over Chino. You'll learn that a rushed approach usually began with a late setup several miles earlier. You'll also learn that the smoothest pilots aren't magically faster. They prepare sooner.
A short video can help reinforce how approach work becomes a sequence of repeatable actions rather than isolated tasks.
 Watch Video
You're probably in one of two places right now. Either you're working on your instrument rating and approach plates still look like dense, cryptic diagrams, or you already have the rating and...
Open the dedicated video pageWhat proficiency actually looks like
A proficient IFR student doesn't need a perfect day to look competent. They brief clearly, fly within tolerances, make timely corrections, and go missed without drama when the approach isn't working.
That's the standard worth chasing. Not flashy avionics work. Not sounding smooth on frequency. Just calm, repeatable control of the procedure from clearance to landing or miss.
Beyond the Rating How to Buy an Airplane Safely
The instrument rating does not end with the checkride. It starts a longer phase of staying current, keeping procedures sharp, and learning how to fly the same approach well in changing conditions.

A lot of student pilots expect proficiency to arrive all at once. In practice, it builds the way an approach does. One segment at a time. You get settled before the fix, configure early, cross-check often, and stay ahead of the airplane instead of chasing it.
That matters over Chino, where workload can rise quickly if the setup is late. A pilot who can brief a Jeppesen plate in the classroom but rushes the avionics in the airplane has not finished the lesson yet. The goal at Du Bois Aviation is to carry the same disciplined flow from the simulator into the school's aircraft, then repeat it until it feels familiar rather than fragile.
A good recurrent plan helps. Pilots usually improve faster with structured practice sessions built around specific objectives, review, and repetition, which mirrors effective course design strategies. IFR training works the same way. Random flying builds time. Deliberate scenarios build judgment.
Keep the standard practical. Can you set up the approach without getting buried in the panel? Can you identify the next fix, altitude, and missed approach step before ATC adds pressure? Can you fly the procedure in the simulator, then do it again in the airplane with turbulence, radio calls, and real cockpit timing?
Those are better questions than whether you technically passed the rating.
Legal currency is part of the picture, but it is only the floor. Reviewing the FAA requirements alongside your own recent performance gives you a more honest view of readiness, especially before flying in actual IMC. Du Bois Aviation students can use this guide to review IFR currency requirements and compare the legal minimums with the proficiency they want in the cockpit.
The safest IFR pilots treat every approach like a familiar route on a highway in the sky. They know where they are, what comes next, and what they will do if the runway never appears. That habit lasts longer than any checkride result.
Becoming a Confident and Proficient IFR Pilot
A confident IFR pilot isn't the pilot who never feels workload. It's the pilot who recognizes it early, manages it, and stays inside the procedure anyway.
That confidence starts with fundamentals. You learn what the segments of an approach mean, how different approach types change your workload, and how to brief a plate so the procedure feels predictable before you reach the IAF. Then you reinforce those habits through repetition until the chart, the radios, and the aircraft start working together instead of competing for your attention.
Proficiency is a practice, not a milestone
The instrument rating is a license to keep learning. If you stop practicing, the skills fade in ways that are easy to hide on clear days and much harder to hide in actual IMC.
That's why recurrent structure matters. Pilots who want to stay sharp often do better when they train with deliberate scenarios, clear learning objectives, and review cycles that resemble effective course design strategies. The idea applies well to IFR work because good training is built around repeated decision points, not random repetition.
If you're keeping your skills current, it also helps to revisit the actual standards and recent-experience rules for IFR currency requirements, then compare those legal minimums with your own honest proficiency standard.
Currency answers whether you may fly. Proficiency answers whether you should.
A good IFR pilot respects both. They know their personal minimums, they brief carefully, and they don't wait for a checkride or IPC to clean up rusty habits. That mindset is what turns instrument approach procedures from something you can survive into something you can fly well.
If you want structured IFR training, simulator practice, or help turning approach plates into usable cockpit routines, DuBois Aviation offers flight training at Chino that supports instrument students, current pilots, and aircraft renters working on real proficiency.


