
You've probably had this flight on the calendar before. The airplane is booked, the route is simple, the passengers are excited, and the weather looks almost good enough. Then a low marine layer hangs in, the visibility won't cooperate, and a trip that should have happened turns into a delay, a cancellation, or a long drive.
That's where the pilot IFR rating changes what flying means. It doesn't make you invincible, and it doesn't remove weather risk. What it does is turn the airplane from a fair-weather machine into a practical transportation tool, provided you train for real-world decision-making and not just for the checkride.
From Grounded by Clouds to All-Weather Freedom
A private pilot at Chino can do almost everything right and still get stuck on the ground. The airplane is airworthy. The route is familiar. The winds are manageable. But if the cloud layer sits where it shouldn't, VFR plans fall apart fast.
That's why instrument training matters. A pilot IFR rating is not about showing off advanced skills. It's about building the ability to control the airplane, guide its path, communicate, and make sound decisions when the view outside stops being your primary reference.

Why this rating is now a mainstream step
A lot of private pilots still think of the instrument rating as something reserved for career-track aviators. That idea is outdated. As of December 31, 2024, about 69% of certificated pilots in the United States, excluding students, held an instrument rating, up from 59% in 2004, according to AOPA's review of FAA pilot data.
That tells you something important. The rating isn't niche anymore. For serious personal flying, business travel, family trips, and long-term ownership, it has become close to standard equipment.
Practical rule: If you want your airplane to serve your schedule more often than the weather's schedule, instrument training is the next logical move.
What changes after you earn it
The first shift is reliability. You stop canceling for conditions that are manageable with proper planning, current skills, and legal equipment.
The second shift is mental discipline. Instrument pilots learn to trust a scan, organize workload, and think ahead of the airplane. That pays off even on clear VFR days.
At a busy airport like KCNO, that discipline starts early. You're not just flying maneuvers in empty airspace. You're learning to work with controllers, sequence with other traffic, brief approaches carefully, and stay ahead while the radios stay active. That environment tends to produce pilots who are more comfortable in the system, not just in the practice area.
Understanding Your FAA Eligibility and Knowledge Requirements
Before you fly a single approach in training, you need to understand what the FAA expects from an instrument applicant. The flying matters, but the headwork matters just as much.
A pilot pursuing an IFR rating under Part 61 must already be operating from a private pilot foundation. From there, the FAA expects a much deeper level of knowledge than many pilots realize when they first start.
The knowledge side is not optional
Under 14 CFR 61.65, instrument applicants must master eight knowledge domains, including the use of weather reports and forecasts, weather trend forecasting, recognition of critical weather situations, and aeronautical decision-making. Those requirements are laid out directly in the FAA regulation text for instrument rating applicants.
That matters because instrument flying is a decision-making rating as much as a control rating.
If a pilot can hold altitude and track a course but can't interpret weather correctly, the training is incomplete. If a pilot can brief an approach but doesn't recognize a deteriorating weather picture before launch, that's a real safety problem.
What you actually need to know
The FAA language can look abstract until you translate it into cockpit tasks. In practice, your study needs to cover things like:
- Weather interpretation: Reading METARs, TAFs, PIREPs, radar products, and broader trend information, then deciding what those reports mean for departure, route, alternate planning, and arrival.
- Regulatory judgment: Knowing what's required to file, launch, continue, divert, and complete an IFR flight legally and safely.
- Navigation systems: Understanding how different systems support different procedures, and where each one can mislead you if you don't monitor it properly.
- Human factors: Recognizing workload buildup, task saturation, and the tendency to chase one problem while missing a bigger one.
How strong students approach ground prep
The best instrument students don't separate ground from flight. They tie every flight lesson to a planning habit.
A useful pattern looks like this:
- Review the route, weather products, and likely procedures before the lesson.
- Brief the expected avionics setup and approach sequence on the ground.
- Fly the lesson with enough awareness to understand why each clearance matters.
- Debrief the mistakes while the sequence is still fresh.
Good IFR students don't just ask, “What do I do next?” They ask, “Why is that the correct next step in this weather, in this airspace, with this equipment?”
That's the standard you want. The checkride depends on it, but single-pilot IFR relies on it even more.
Your Instrument Training Syllabus and Key Milestones
Instrument training usually feels demanding at first because so many tasks stack together. You're controlling the airplane by reference to instruments, tracking courses precisely, managing radios, thinking about the next fix, and preparing for the next clearance before the current one is finished.
That workload gets manageable when the syllabus builds in the right order.

Early stage skills that matter more than students expect
At the start, most pilots want to jump straight to approaches. That's understandable, but it's backward. The early phase should focus on aircraft control and scan discipline.
You need to be able to hold altitude, heading, airspeed, and configuration changes smoothly without outside references. If that isn't solid, holds and approaches become a blur of corrections.
Core early lessons usually include:
- Attitude instrument flying: Straight-and-level, standard-rate turns, climbs, descents, and recoveries while staying on a disciplined scan.
- Partial panel work: Handling failures or degraded instrument information without falling apart mentally.
- Intercepting and tracking: Learning how to join and stay on courses without overcontrolling.
- Workload organization: Setting up radios, avionics, and checklists in the right order.
The middle phase where things become real
Once the scan improves, training shifts toward procedure work. At this point, instrument flying starts to feel operational instead of academic.
You'll spend time on holds, route changes, vector-to-final scenarios, approach briefings, missed approaches, and transitions between different nav sources. The FAA requires more than just familiarity here. Part 61 requires instrument applicants to log 50 hours of cross-country PIC time and complete a 250 nautical mile IFR cross-country with approaches at each airport, including three different types of approaches, as described in AOPA's instrument rating requirements guide.
That requirement exists for a reason. It forces you to put the whole system together over a longer flight, not just survive a few local repetitions.
For pilots comparing training options, an instrument rating course at Chino puts that work in a busy environment where procedures, communications, and sequencing feel closer to the way IFR is flown.
Why KCNO is useful training ground
Chino gives students a kind of friction that helps. There's towered traffic, multiple runways, and real instrument procedures to brief and fly. You learn to manage timing, spacing, and radio discipline while still flying the airplane accurately.
That's different from training where every lesson happens in quiet airspace with very little interruption.
A busy field teaches habits that transfer well:
| Training focus | What the pilot learns at a busy airport |
|---|---|
| Radio work | How to copy, confirm, and act on clearances without losing aircraft control |
| Approach setup | How to brief and configure early enough to avoid rushing final segments |
| ATC flow | How to expect amended instructions and stay flexible |
| Ground operations | How to manage checklists and taxi tasks without falling behind |
Students often think the hardest part of IFR is the approach itself. In practice, many early mistakes happen before the approach begins, when the pilot gets behind on setup.
By the end of training, the goal isn't to make every flight look pretty. It's to make your process consistent, calm, and recoverable when something changes.
The IFR Practical Test and What to Expect
The instrument checkride feels intimidating until you understand what the examiner is really looking for. The standard isn't perfection. It's competence, judgment, and control.
A good examiner wants to see that you can operate as a safe single-pilot IFR aviator. That means you know the rules, understand the weather picture, prepare thoroughly, and stay organized when the plan shifts.

The oral portion
The oral usually starts before the examiner asks a formal question. Your planning materials, chart organization, weather review, and aircraft documents already tell a story.
Expect scenario-based discussion more than trivia. An examiner may ask how you'd plan a flight in marginal conditions, what weather products matter most for your route, what makes an alternate practical, or how you'd handle equipment issues before departure.
Strong answers are methodical. Weak answers sound memorized.
A useful mindset is to talk like a pilot making a real go or no-go decision, not like a student trying to recite flash cards.
The flight portion
In the airplane, the examiner wants to see that you can stay ahead of the flight. You'll likely demonstrate some combination of route tracking, holding, unusual attitude recovery, and instrument approaches to minimums, along with a missed approach and reconfiguration tasks.
What usually hurts applicants isn't one big mistake. It's task management. A pilot fixates on one frequency change, misses altitude, rushes a briefing, then compounds the error on final.
This walkthrough gives a useful cockpit view of instrument flying workload and pacing:
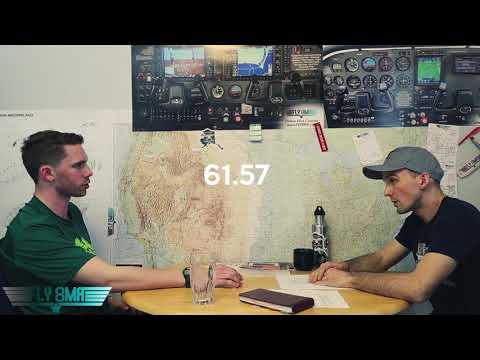 Watch Video
You've probably had this flight on the calendar before. The airplane is booked, the route is simple, the passengers are excited, and the weather looks almost good enough. Then a low marine...
Open the dedicated video pageIf you haven't flown instruments in a while, an instrument proficiency check option is also a practical way to sharpen procedures before stepping back into real IFR or preparing for recurrent work.
Bring the mindset of a careful operator, not a performer. Examiners trust pilots who catch small errors early and correct them calmly.
Estimating the Time and Cost for Your IFR Rating
Many pilots get surprised. They look at the FAA minimums, assume the rating will fit neatly into a short calendar window, and then training stretches because life gets in the way.
The practical reality is that while FAA minimums cite 40 hours of instrument time, most pilots take 60 to 80+ hours, with weather delays, scheduling conflicts, and proficiency decay pushing completion farther out, as summarized in this instrument training timeline discussion.
Why training takes longer than expected
The first reason is inconsistency. Instrument skills are perishable. If you fly, then wait, then restart, each lesson begins with some catch-up.
The second reason is that IFR lessons are dense. A single flight can include clearances, route changes, holds, two approaches, a missed, and debriefed mistakes that need repetition before they become habits.
The third reason is weather and traffic flow. At a busy airport, training is valuable because it's realistic, but realistic flying also means delays, sequencing, and occasional changes to the original lesson plan.
A smarter way to budget
Instead of asking for the cheapest possible path, ask for the most consistent one. A schedule you can maintain usually saves more money than a lower hourly rate paired with long gaps.
Costs vary by aircraft, instructor rate, simulator availability, insurance requirements, and how much review you need between lessons. The safest way to estimate is to build a range and keep a reserve for extra training.
Here's a sample planning table you can adapt to your local rates.
| Expense Category | Estimated Hours / Units | Estimated Cost |
|---|---|---|
| Aircraft rental for instrument training | Varies by training plan | Varies |
| CFII flight instruction | Varies by training plan | Varies |
| Ground instruction | Varies | Varies |
| Simulator sessions | Varies | Varies |
| Jeppesen or other study materials | 1 set | Varies |
| FAA knowledge test fee | 1 | Varies |
| Examiner fee for practical test | 1 | Varies |
| Headset, charts, app subscriptions, supplies | As needed | Varies |
What works and what usually doesn't
A few patterns show up again and again.
What works: Booking lessons close enough together that skills build instead of reset.
What works: Using simulator time for procedure repetition, especially holds, intercepts, and approach setup.
What works: Showing up with weather, route, and plate review already done.
What doesn't: Treating instrument training like an occasional recreational lesson.
What doesn't: Waiting for every condition to feel perfect before flying.
What doesn't: Measuring progress only by total hours instead of by consistency and retention.
If you're evaluating programs, ask whether they can support regular scheduling, simulator integration, and enough instructor continuity to keep your training flow intact.
Unlocking True Freedom with Aircraft Ownership
For many pilots, the instrument rating becomes most valuable after the checkride, when they start thinking seriously about buying an airplane or helicopter. Ownership changes the conversation from “Can I rent something next weekend?” to “Can this aircraft support the way I want to travel?”
Without instrument capability, personal aircraft ownership often stays confined to good-weather leisure flying. With a pilot IFR rating, the same airplane becomes far more useful for business trips, family travel, and time-sensitive flying when the weather is less than ideal but still within the pilot's capability, aircraft equipment, and legal limits.

Why ownership and instrument training fit together
A buyer who plans to travel should evaluate an airplane differently than a buyer who only wants local sunset flights. Dispatch reliability, panel capability, autopilot condition, maintenance history, and useful load start to matter more.
That doesn't mean every owner needs an advanced cross-country machine. It means your purchase should accurately align with your mission.
A practical comparison of common trainers and time-builders, such as this look at the Piper Cherokee vs Cessna 172, can help a pilot think through stability, comfort, mission profile, and training utility before making the jump into ownership.
How to buy an airplane the safe way
Buying safely is less about finding a bargain and more about avoiding expensive surprises.
Use this checklist:
Define the primary mission
Don't buy around fantasy trips. Buy around the flights you expect to make most often. Short local flights, regional family travel, instrument cross-country use, and time-building all point to different aircraft choices.
Get an independent pre-buy inspection
Hire a trusted A&P mechanic who knows the aircraft type and who does not work for the seller. A pre-buy should review logs, airframe condition, engine history, avionics, signs of corrosion, damage history, and deferred maintenance.
Review the paperwork carefully
Make sure logbooks are complete, AD compliance is documented, and ownership records are clean. A title search and escrow process can help keep the transaction orderly.
Budget for the first year realistically
New owners often focus on purchase price and ignore insurance, tiedown or hangar costs, recurrent training, maintenance catch-up, subscriptions, and equipment squawks.
The safest airplane purchase is usually the one that leaves room in the budget for training, maintenance, and patience after the sale.
The same logic applies to helicopters. Mission, maintenance support, and training access matter more than a low asking price.
Your Next Steps Checklist at DuBois Aviation
If you're serious about earning a pilot IFR rating, the next step shouldn't be vague. It should be scheduled.
A clear plan keeps training moving and helps you avoid the stop-start pattern that causes unnecessary delay.
A simple way to get started
- Visit the airport with a purpose: Schedule a discovery flight, observation visit, or planning meeting so you can see how instrument training operates in a towered environment.
- Talk through your mission: Tell the instructor whether you want better personal travel capability, career progression, aircraft ownership readiness, or recurrent proficiency.
- Build a training calendar, not just a wish list: Put lessons on the schedule in a pattern you can maintain. Consistency matters more than enthusiasm for one week.
- Start ground prep immediately: Use a structured curriculum and tie every study block to the flights you're about to do.
- Plan for proficiency after the checkride: Many pilots struggle with rusty instrument skills after certification, and while regulations require a flight review every 24 calendar months, real proficiency takes more regular practice and recurrent simulator work, as noted in this discussion of instrument skill decay and recurrent training.
What to avoid on day one
A few habits make instrument training harder than it needs to be:
- Waiting for motivation to appear: Progress comes from booked lessons.
- Underestimating study time: IFR flying rewards pilots who prepare on the ground.
- Training only to pass: The checkride is one day. The rating should support years of safer flying after that.
If your long-term goal includes ownership, commercial training, or more capable cross-country flying, starting now usually beats waiting for the “perfect” time.
DuBois Aviation offers instrument training, aircraft rental, simulator access, and recurrent support at Chino Airport for pilots who want a structured path from private pilot flying into practical IFR capability. If that matches your goals, visit DuBois Aviation and set up a conversation about your next training step.


