
The math behind crosswinds is actually pretty straightforward. The formula is Wind Speed × sin(Angle), where the angle is just the difference between the wind direction and the runway you’re using. But in the real world, most of us use mental shortcuts. A good rule of thumb is that if the wind is 30 degrees off the nose, your crosswind is about half the total wind speed. Once it gets to 60 degrees or more, you're basically dealing with the full wind value.
Why Nailing Your Crosswind Calculation Is a Must
Before you ever line up on the centerline, you need to have a handle on the wind. This isn't just a skill for your checkride; it's a fundamental piece of airmanship that every pilot, from day one in a Cessna 150 to a career in the airlines, relies on for every single flight.
Getting the wind wrong isn't a minor mistake—it can quickly lead to a loss of control or a runway excursion. Think about lining up for final at a busy airport like Chino (KCNO) on a gusty afternoon. Your ability to quickly and accurately figure out that crosswind component is what informs your decision to continue the approach or go around.
The Bedrock of Good Airmanship
At its core, this one calculation is a direct reflection of your judgment as a pilot. It doesn't matter if you're flying a fixed-wing airplane or a helicopter; a strong crosswind pushes the limits of the aircraft's control authority, especially when you're slow during takeoff and landing.
This need to account for environmental factors isn't unique to flying. For instance, competitive cyclists put a huge emphasis on understanding the wind's impact on cycling speed to plan their race strategy. For a pilot, though, it's not about strategy—it's about safety and maintaining control.
General aviation safety data consistently shows that a large number of landing accidents are caused by pilots failing to properly handle a crosswind. It’s no wonder this is a Day 1 skill that instructors drill into you.
To help you build that mental muscle, here’s a quick reference table for estimating your crosswind component on the fly.
Crosswind Component Quick Reference
This table is a great starting point for making quick mental estimates. It shows you the approximate crosswind component you'll experience as a percentage of the total wind speed, based on the angle between the wind and the runway.
| Wind Angle (Degrees) | Approximate Crosswind Percentage | Example With a 20 Knot Wind |
|---|---|---|
| 15° | 25% (or 1/4) | 5 knots |
| 30° | 50% (or 1/2) | 10 knots |
| 45° | 75% (or 3/4) | 15 knots |
| 60° or more | 100% (Full Value) | 20 knots |
Memorizing these key angles—especially the 30° and 60° marks—gives you a solid, in-cockpit tool for making a confident go/no-go decision.
Doing The Math: The Classic Crosswind Formula

While mental math is great for a quick check, sometimes you need a hard number. When the wind is gusting and you're getting close to your aircraft's published limits, "close enough" isn't good enough. For that, we fall back on the tried-and-true trigonometric formula taught in every ground school.
This is the bedrock of crosswind calculation. It’s the math that proves why our mental shortcuts work, and it provides the concrete data you need for a confident go/no-go decision. The formula itself is simpler than it sounds.
Crosswind Component (XWC) = Wind Speed × sin(θ)
In this equation, θ (theta) is just the angle between the runway's heading and the wind's direction.
A Real-World Example
Let's put this into practice. Picture this: you're lined up for Runway 26L at Chino Airport (KCNO). The ATIS is calling the winds from 290° at 20 knots.
First, you need to find the angle between the wind and the runway. Runway 26L has a magnetic heading of 260°. The difference between the wind at 290° and the runway at 260° is 30°. That’s your angle, θ.
Next, you grab a calculator (or an E6B) to find the sine of that 30° angle. The sine of 30° is 0.5.
Finally, multiply the total wind speed by that sine value. With a 20-knot wind, your crosswind component is 10 knots (20 knots × 0.5).
This method gives you a precise, unambiguous number. It’s a classic technique that pilots have been scribbling on kneeboards for decades. A training example I often use with students involves a scenario for Runway 21 with winds from 240° at 20 knots. The angle is again 30°, so the crosswind is exactly half the wind speed—10 knots.
Why Precision Is King
Knowing this exact number is critical. For student pilots at Chino flying a Piper Cherokee, which has a max demonstrated crosswind of about 17 knots, a 10-knot crosswind is manageable. But what if the winds were stronger, and your calculation came out to 16 knots? That’s where precision becomes your best friend.
Having that hard data allows you to make the safest call. If the number is well within your comfort zone and the aircraft’s limits, you can proceed with confidence. If it's pushing the boundary, you have the justification you need to request a different runway or even divert.
This commitment to precision isn't just a pilot thing; it's a hallmark of any professional who relies on data to manage risk. For instance, business leaders apply the same rigor when Mastering Customer Lifetime Value Calculation to make critical financial decisions. For a pilot, getting the numbers right is a direct line to staying safe.
Mental Math With The Clock Face Method
While the sine formula is perfectly accurate, nobody is punching numbers into a calculator while turning from base to final. In the real world, especially in a busy traffic pattern, you need a quick, reliable way to figure out your crosswind. This is where good old-fashioned mental math comes in.
The most trusted shortcut out there is the Clock Face Method. It's a brilliantly simple way to visualize the wind and get a solid estimate in seconds.
Just picture your aircraft at the center of a clock, with the nose pointing straight up to 12. The wind's direction is the minute hand. The position of that minute hand tells you almost everything you need to know.
Applying The Rule of Sixths
This technique, sometimes called the "Rule of Sixths," is the practical application of the clock face. The core idea is that every 10 degrees of angle difference between your heading and the wind gives you about one-sixth of the total wind as a crosswind.
But for most pilots, it's even easier to think in 15-degree chunks. It lines up perfectly with common fractions and makes the math a breeze. Here's how I remember it:
- 15 Degrees Off: The wind is like the "15-minute" mark on the clock (or 1 o'clock). Your crosswind component is about 25% (a quarter) of the total wind speed.
- 30 Degrees Off: This is the "30-minute" mark (or 2 o'clock). The crosswind is roughly 50% (half) of the total wind.
- 45 Degrees Off: The wind is at the "45-minute" mark (or 3 o'clock). The crosswind is approximately 75% (three-quarters) of the total.
- 60 Degrees or More: Once the wind is past the 3 o'clock position, just consider it a direct crosswind. For safety and simplicity, use the full wind speed as your crosswind component.
The point here is to get a fast, conservative number. If you're ever in doubt, always round up. If the angle feels like it's somewhere between 30 and 45 degrees, use the 45-degree (75%) estimate. That built-in safety margin is your best friend.
Practical Scenarios In The Cockpit
Let's see how this works in a real situation. You're on downwind in a Piper Apache, and the tower at KCNO reports winds are 30 degrees off the runway heading at 18 knots. Using the clock method, you instantly know your crosswind is about half the total wind—a very manageable 9 knots. No calculator needed.
Suddenly, the controller updates the wind: it's now 45 degrees off the runway, still at 18 knots. Your mental math immediately tells you it's now about three-quarters of the total, putting you around 13-14 knots. This instant calculation lets you decide if you're still comfortable with the landing without breaking your focus on flying the plane.
This is a skill we drill into students constantly. Pilots at busy flight schools like DuBois Aviation in Southern California live by these quick mental math tricks because every second counts in a packed pattern. The clock face method, a staple in pilot workshops since the 2000s, is a favorite for a reason. In fact, FAA data suggests that over 70% of General Aviation pilots rely on these approximations for their real-time decisions.
If you want to dive deeper, you can find more on these quick mental shortcuts at PilotWorkshop.com. This is a fundamental skill that's just as valuable whether you're flying a fixed-wing Mooney or a Robinson R22 helicopter.
Using a Crosswind Chart for a Quick Visual Check
While doing the math on the fly is a great skill, don't forget about one of the most powerful tools already sitting in your flight bag: the crosswind component chart in your Pilot’s Operating Handbook (POH). This graph is your best friend for getting a fast, accurate, and intuitive read on both your crosswind and headwind.
Learning to read this chart is more than just a neat trick; it's a fundamental piloting skill. It provides a visual gut-check that reinforces the relationship between wind angle, speed, and the actual forces pushing on your aircraft. For many of us, seeing it laid out graphically makes the whole concept click in a way that punching numbers into a calculator just can’t replicate.
How to Read the Chart
At first glance, these charts can look like a confusing jumble of lines and arcs. But once you know what you're looking for, they become incredibly simple. Think of it as a three-step process.
- Find Your Wind Angle: Start with the arcs at the bottom. These represent the angle between the runway and the wind direction, usually marked in 10-degree increments. Pinpoint your wind angle here.
- Trace Up to Wind Speed: From that angle, move straight up the chart until you hit the curved line that matches the total wind speed reported by ATIS (e.g., 10 knots, 20 knots, 30 knots).
- Read Across and Down: From that intersection point, trace a line straight left to the vertical axis. That’s your crosswind component. Now trace another line straight down to the horizontal axis. That’s your headwind component.
This visual method is incredibly efficient, whether you're doing pre-flight planning at the FBO or need a quick confirmation just before takeoff. It instantly gives you the two most critical numbers you need to assess your performance and make a smart go/no-go decision.
A Real-World Example: Mooney M20B
Let's put this into practice. Imagine you're on approach in a Mooney M20B. The tower reports winds that are at a 40-degree angle to your landing runway, gusting up to 25 knots.
Pulling out the chart, you’d find the 40-degree arc at the bottom. Follow that line up until it intersects with the curve for 25-knot winds. Now, look to the left—the crosswind is 16 knots. Look down—the headwind is 19 knots. You’ve just visually confirmed your numbers and can now compare that 16-knot crosswind directly against the Mooney's demonstrated limit.
This method has been a cornerstone of flight training for decades. Back in the 1970s, when crosswind charts became standard in Jeppesen materials at flight schools like DuBois Aviation, they were a game-changer for students learning in Mooneys or Cessna 150s.
For example, if you're cleared to land on Runway 18 and the winds are from 210 at 40 knots (that's a 30-degree difference), a quick glance at the chart tells you to expect a 35-knot headwind and a 20-knot crosswind. If your aircraft's max demonstrated crosswind is 17 knots, the chart makes the decision to divert crystal clear. This simple visual has had a massive impact on general aviation safety, a key element in your overall VFR cross-country flight planning.
How To Buy An Airplane The Safe Way
Making the leap from renting to owning an airplane is an incredible feeling. That excitement, however, can quickly turn into a costly headache if you're not careful. Buying a plane safely isn't about haggling over the price—it's about doing your homework to avoid inheriting someone else's problems. This applies whether you're buying a fixed-wing airplane or a helicopter.
I can't stress this enough: never, ever buy an aircraft without a thorough pre-buy inspection. This isn't just a quick look-over. It needs to be a deep dive by a trusted A&P/IA mechanic who works for you, not one recommended by the seller. This single step is your best defense against hidden corrosion, a tired engine, or undocumented damage history.
Just as important is a complete title search. You need to be absolutely sure the aircraft is free of any liens or legal baggage. The last thing you want is the bank coming after your new plane because the previous owner had outstanding debt tied to it.
Finally, you need to become a detective and pour over the logbooks. These books tell the plane's entire life story. Look for a consistent maintenance history, proof of compliance with all Airworthiness Directives (ADs), and any mention of damage repairs. Gaps or vague entries are serious red flags.
There's an old saying in the maintenance world: "If it's not in the logbook, it didn't happen." That goes for both routine work and major repairs, so a pristine paper trail is non-negotiable.
For pilots looking for local maintenance and support services to assist in the ownership journey, you can find a great list of aviation businesses at Chino Airport.
From Calculation to Command Decision-Making
Figuring out the crosswind component is just crunching the numbers. The real test of airmanship—what separates a student from a pilot-in-command—is what you do next. This is where you translate that number into a confident, safe decision.
That calculated value isn't just for your logbook; it's a critical piece of the go/no-go puzzle. You need to stack it up against two vital benchmarks: your aircraft's demonstrated crosswind capability and, more importantly, your own personal minimums.
Aircraft Limits vs. Personal Minimums
Every Pilot's Operating Handbook (POH) includes a demonstrated crosswind component. This is the highest crosswind speed a factory test pilot managed during certification flights. It’s crucial to understand this is not an operational limitation. However, a sharp and disciplined pilot treats it like one.
Your own personal minimums are even more critical. These aren't static; they reflect your real-world experience and recent proficiency. A pilot with 50 hours simply shouldn't be tackling the same crosswinds as a 5,000-hour CFI. Be honest with yourself. If you haven't flown in a stiff crosswind in six months, your personal minimums should be lower than they were when you were flying three times a week.
This chart is a fantastic tool for getting a quick visual read on the wind components.
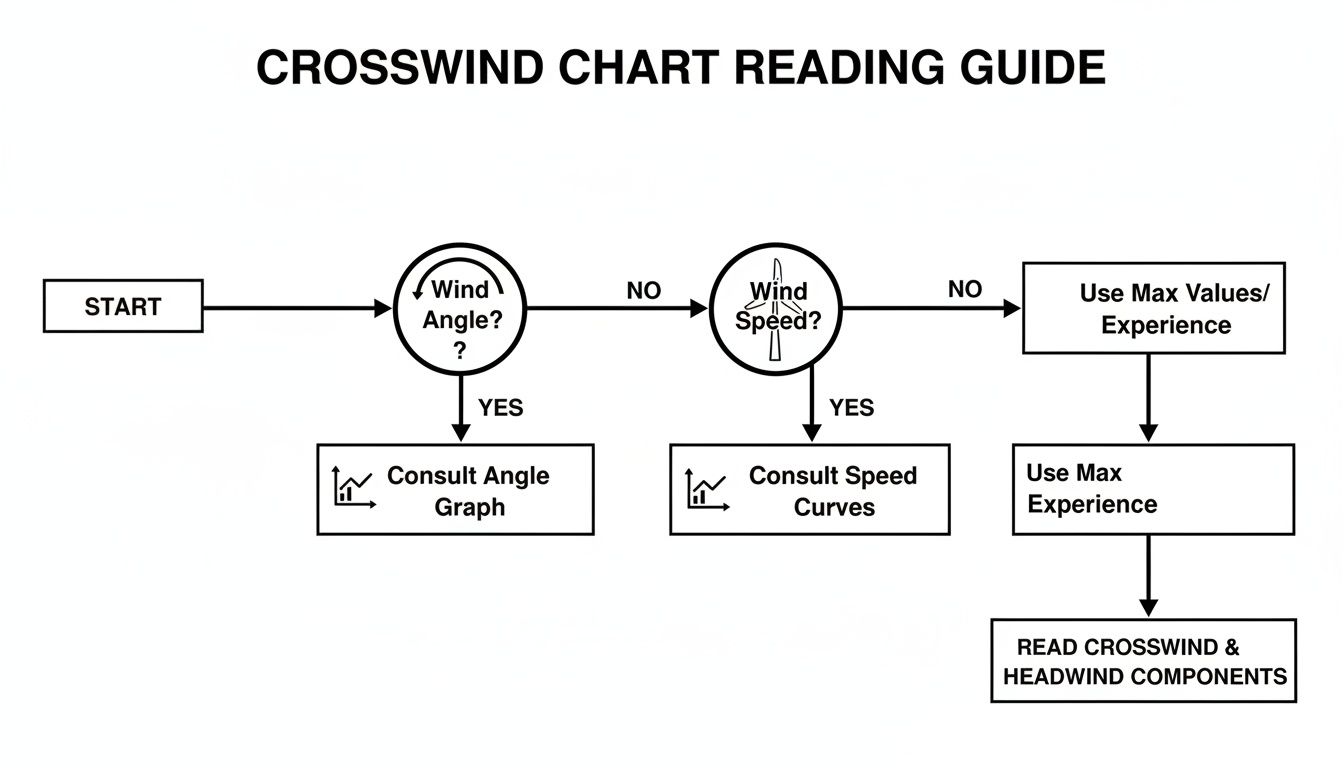
By tracing the lines from the wind angle and speed, you can instantly see if the numbers fall within your comfort zone and the aircraft's established performance envelope.
Factors That Complicate Your Decision
A simple number rarely tells the whole story. Your decision-making has to account for real-world conditions that can dramatically shrink your margin of safety.
- Gusty Winds: If the ATIS reports winds are "15 gusting 25," your calculation must use the 25-knot gust. A sudden 10-knot increase at a critical moment can push you well beyond your ability to control the aircraft.
- Runway Conditions: A wet, icy, or otherwise contaminated runway is a game-changer. It drastically reduces your tires' grip, making it much harder to counteract the plane's natural tendency to weathervane into the wind.
- Surrounding Obstacles: Don't forget what's around the runway. Trees, hangars, and other buildings can create significant mechanical turbulence, introducing unpredictable wind shifts and shears right when you're most vulnerable—on short final.
A wise pilot once said, "It's better to be on the ground wishing you were in the air than in the air wishing you were on the ground."
This is the essence of PIC responsibility. If your calculated crosswind—accounting for gusts and runway conditions—exceeds your personal minimums, the decision is already made for you. Ask ATC for a different runway. If a better option isn't available, make the command decision to divert to your alternate.
Making that conservative call isn't a sign of weakness. It's a mark of superior judgment. For more tips on mastering the maneuver itself, check out our guide on crosswind landing techniques.
Common Crosswind Questions Answered
No matter how many hours you have in your logbook, crosswinds always demand respect. I get questions about them all the time, from brand new students to seasoned pilots looking to sharpen their skills. Let's clear up a few of the most common ones.
Is the "Demonstrated Crosswind" a Hard Limit?
This is a big one. That number you see in the Pilot's Operating Handbook (POH) for the demonstrated crosswind is not a legal limitation. It's simply the strongest crosswind a factory test pilot successfully landed in during the plane's certification flights.
However, a true limitation would be spelled out clearly in the limitations section of the POH, and flying beyond it is illegal. So, while you can legally attempt a landing beyond the demonstrated value, you're stepping into uncharted territory.
I always tell my students to treat the demonstrated crosswind as their own personal hard limit. Anytime you fly beyond that number, you're essentially acting as a test pilot. That's not a job you want on a typical Saturday flight.
Does This Math Work for Helicopters, Too?
Yes, the basic trigonometry—Wind Speed x sin(angle)—is the same whether you have wings or rotors. What changes dramatically are the aerodynamics and control inputs involved.
Crosswinds present a whole different set of challenges for helicopters. You have to worry about things like tail rotor effectiveness and the potential for loss of tail rotor authority, which can be catastrophic. The procedures are completely different.
Always have your Rotorcraft Flight Manual (RFM) handy. The techniques for handling a crosswind in a Robinson R22 are very different from those in an Enstrom or a larger turbine helicopter.
How Do I Handle "Variable" Winds?
When you hear ATC or the ATIS report the winds as 'variable,' your pilot brain should immediately prepare for the worst-case scenario. It's a signal to be extra cautious.
Assume the wind could swing around to the most challenging direction possible: a direct 90-degree crosswind. This means you have to treat the entire reported wind speed as your potential crosswind. If the wind is "variable at 15 knots," you plan for a 15-knot crosswind.
This is a critical moment for good decision-making. Does that potential put you over the aircraft's demonstrated capability or, more importantly, your personal minimums?
Mastering these skills is what separates a good pilot from a great one, whether you're just starting your private pilot training or flying professionally. At DuBois Aviation, we focus on building that real-world confidence through one-on-one instruction. We're here to help you develop the judgment you need for any situation the sky throws at you.