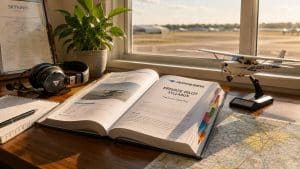
A lesson usually starts before the engine does. You show up with a headset in hand, watch two trainers taxi past, hear a fast exchange with the tower, and realize pilot training is not just about steering an airplane. It is about learning to operate safely inside a system.
That is why private pilot license training works best when it is treated as a full process from day one, not a box to check on the way to a certificate. The goal is to build sound habits early, then add speed and workload as your skill catches up. Students who train in a busy environment such as KCNO usually get more useful repetitions per hour: radio calls that matter, real traffic conflicts to sort out, and clearer standards for cockpit discipline. Done well, that kind of exposure can improve proficiency faster than quiet-airport training that postpones complexity until later.
You may be here because you took a discovery flight. You may be comparing schools, aircraft, schedules, and total cost, trying to decide whether this is realistic.
Two practical options worth comparing
These are specific products pilots commonly compare for this type of flying. Confirm compatibility with your aircraft and instructor before ordering.
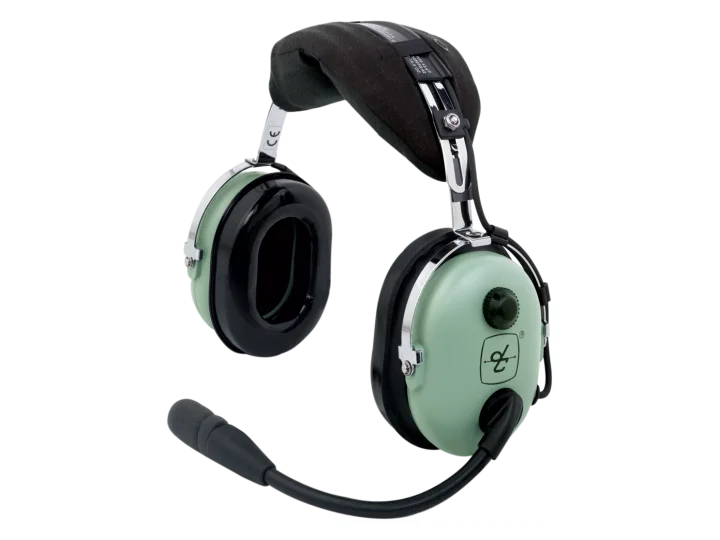 Student headsetDavid Clark H10-13.4 Aviation HeadsetCheck current availability on Amazon (paid link)
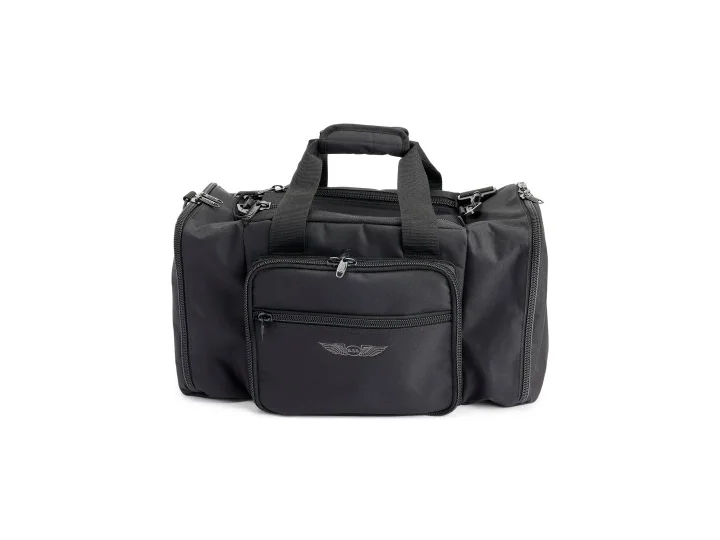 OrganizationASA Flight BagCheck current availability on Amazon (paid link)
It is realistic.
It is also more demanding than many first-time students expect. The private pilot certificate is the entry point for personal flying, future ratings, and in some cases a professional path, but the students who finish efficiently are rarely the ones chasing FAA minimums. They fly consistently, prepare between lessons, use a simulator for procedures instead of wasting aircraft time on basic flow practice, and train in an airplane that matches the mission and the budget. I have seen students save time and frustration by choosing a school with reliable dispatch, good maintenance, and instructors who teach to a standard instead of improvising every lesson.
That matters at a place like DuBois Aviation. Training at a towered airport with steady traffic gives students early practice with communications, sequencing, runway changes, and distractions they will face in real flying after the checkride. The first few lessons can feel busy. In the long run, that workload usually produces a more confident and more capable pilot.
Hours matter. Judgment matters more. The certificate comes after both.
Your Journey to the Sky Starts Here
On your first lesson at a busy airport, the airplane is idling, Ground gives a taxi instruction that sounds fast, another aircraft crosses in front of you, and your instructor is already asking for the before-takeoff checklist. That moment tells students what private pilot training really is. It is not just learning to steer an airplane. It is learning to stay organized, communicate clearly, and make good decisions while the pace picks up.
A private pilot certificate allows you to fly for personal travel and recreation, carry passengers, and build the foundation for every rating that may follow. For some students, that is the final goal. For others, it is the first serious checkpoint that shows whether aviation is going to stay a passion or become a long-term path.
What the first phase really feels like
Early training is busy by design.
You are learning checklists, cockpit flows, radio phraseology, basic aerodynamics, weather habits, and aircraft control at the same time. Students often assume the hardest part will be takeoffs or landings. In practice, the bigger challenge is dividing attention correctly without getting behind the airplane.
That is one reason training at a towered airport like KCNO can help serious students progress efficiently. You get exposed to real radio work, sequencing, runway changes, and traffic management from the start. The workload is higher in the first few lessons, but students who train in that environment usually develop stronger habits earlier. At DuBois Aviation, that pace is part of the value if you show up prepared and train consistently.
Flying gets simpler when the cockpit stops feeling random and starts feeling ordered.
A good instructor does not throw everything at you at once. The lesson plan should build in layers. First comes attitude control and checklist discipline. Then communication and pattern work start to feel manageable. Add simulator sessions for flows, callouts, and procedures, and you save aircraft time for what the airplane teaches best: sight picture, coordination, landings, and judgment.
Why this goal is more attainable than it looks
The students who finish efficiently are rarely the students chasing the minimum legal hour count. They are the ones who train on a steady schedule, study before each lesson, and use the right tool for the job. Chair-flying and simulator practice can sharpen procedures on the ground. Reliable aircraft availability and consistent instruction keep that progress from stalling.
Aircraft choice matters too. A simple, well-supported trainer usually beats a more complicated airplane that costs more per hour and adds workload before you are ready for it. New students do better when the airplane is predictable, available, and appropriate for the syllabus.
A strong start usually looks like this:
- Take a discovery flight with a training mindset: Ask how the school schedules lessons, handles maintenance, and matches students with instructors.
- Set a realistic training rhythm: Two or three lessons a week usually produces better retention than long gaps between flights.
- Use a simulator for procedure practice: Radios, checklists, flows, and instrument references can be practiced on the ground at a lower cost.
- Expect the first lessons to feel awkward: Taxi, radio work, and landing sight pictures improve with repetition, not with guessing.
- Learn from schools with visible student outcomes: Reviews like these Aerostudies testimonials can help you see how structured programs feel from the student side.
This goal is realistic. It also rewards preparation, consistency, and patience. Students who accept that early tend to spend less, train more efficiently, and show up to the checkride as safer pilots.
Laying the Groundwork Prerequisites and Medicals
Before first solo and well before the checkride, you need a few basics in order. This part isn’t glamorous, but students who handle it early avoid a lot of wasted time later.
Basic eligibility
For a private pilot certificate, you need to meet FAA eligibility standards, including age and English proficiency. In practical terms, that means you need to be able to read, speak, write, and understand English well enough to operate safely in the national airspace system.
That standard matters more than people think. Aviation English isn’t casual conversation. You need to understand instructions, read charts and weather products, and respond clearly under workload.
The medical certificate most private students need
Most private pilot students should plan on obtaining a third class medical certificate before getting deep into training. Even if a school lets you begin some instruction before the exam, it’s smarter to confirm you can qualify before you invest heavily in lessons.
The process is usually straightforward when you prepare for it correctly.
A clean way to approach the medical
Find an Aviation Medical Examiner
Use the FAA AME locator and choose a doctor who regularly performs pilot medicals. Experience matters because a seasoned AME tends to explain the process clearly and identify paperwork issues before they become delays.Complete the MedXPress application carefully
Fill it out accurately and completely. Don’t guess, and don’t omit prior conditions, medications, or treatments. In aviation, incomplete paperwork creates more trouble than uncomfortable honesty.Bring supporting records if you have a history
If you’ve had surgery, take medication, wear corrective lenses, or have managed a condition over time, ask in advance what documents the AME will want to see. Showing up prepared is often the difference between a routine issuance and a long follow up.Treat the exam like an operational requirement
Rest well, bring identification, and arrive early. If you use glasses or contacts, bring them.
Practical rule: If you have any medical concern that might affect certification, talk to an AME before you commit to a full training schedule.
Third class, second class, and first class
New students often hear these terms and assume a higher class medical is “better.” That’s not really the right way to think about it.
- Third class medical: Common for private pilot training and personal flying.
- Second class medical: Typically relevant if you plan to exercise commercial privileges later.
- First class medical: Usually associated with airline career paths and stricter standards.
If your immediate goal is a private pilot certificate, the third class is usually the appropriate place to start. If you already know you want to move into a professional track, some students choose to discuss a higher class medical earlier so they understand the standards they may eventually face.
Common mistakes students make
A lot of avoidable frustration comes from timing and assumptions.
| Common issue | Better approach |
|---|---|
| Starting training first and medical later | Handle the medical early |
| Hiding a prior condition | Disclose it and bring records |
| Waiting until checkride prep to fix paperwork | Build an admin checklist from day one |
| Assuming all doctors know FAA standards | Use an experienced AME |
If you have questions about medication, past diagnoses, or whether a condition could create complications, don’t rely on online forum guesses. Get real guidance before the issue becomes expensive.
The Core Curriculum Ground and Flight Training Syllabus
Private pilot training works best when ground study and flight lessons stay tightly connected. A student who understands weather, airspace, and aircraft systems before engine start usually learns faster in the cockpit, makes fewer avoidable mistakes, and needs less review later.
At a busy towered airport such as KCNO, that connection matters even more. Students are not just learning stick and rudder skills. They are also learning how to copy clearances, stay ahead of radio calls, fit into faster traffic, and keep the airplane under control while the workload rises. That environment often produces sharper habits early, especially when the instructor follows a disciplined syllabus instead of treating each lesson like an isolated flight.
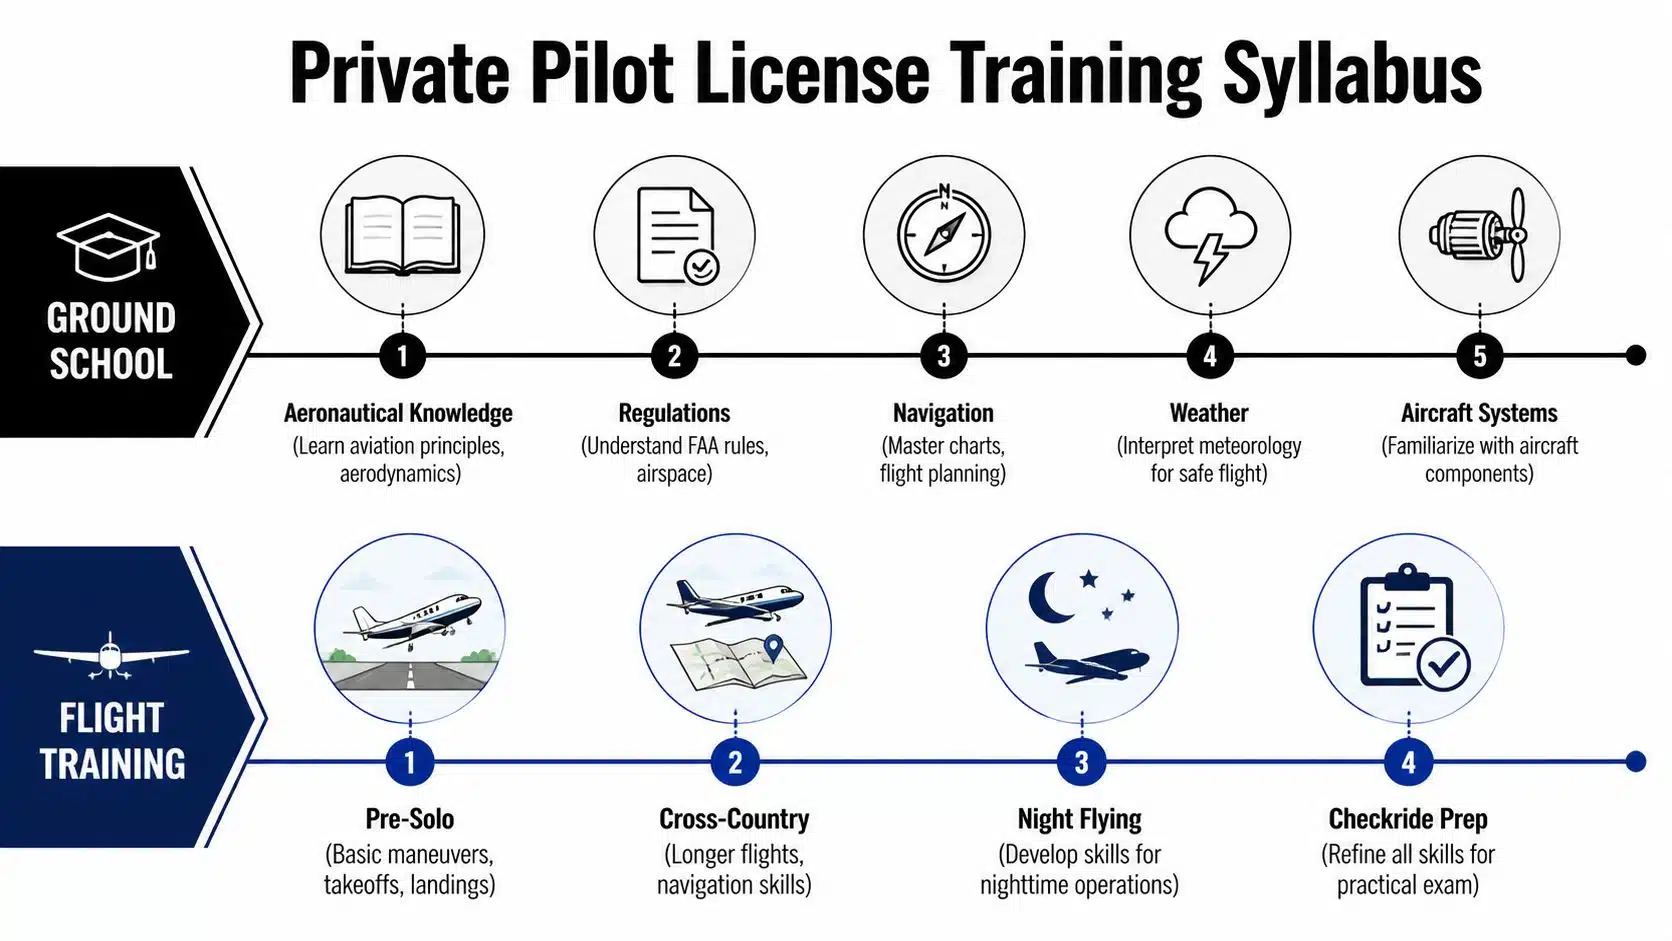
Ground school gives each flight a purpose
Ground training is not just preparation for the written test. It gives you the framework to understand what the airplane is doing, what ATC expects, and what conditions should keep you on the ground.
A structured course usually covers:
- Aerodynamics: lift, drag, stability, stalls, spins, and why control inputs produce the results you see
- Regulations: pilot privileges and limits, required documents, airspace rules, and operating requirements
- Navigation: sectional charts, pilotage, dead reckoning, VOR and GPS use, and practical flight planning
- Weather: METARs, TAFs, fronts, local wind patterns, visibility issues, and weather decision-making
- Aircraft systems: engine operation, fuel and electrical systems, flight instruments, limitations, and normal versus abnormal indications
- Performance and weight and balance: how loading, density altitude, and runway conditions change the margin you have
Students absorb this material faster when each topic shows up in the airplane soon after they study it. If you learn crosswind technique in ground school, then see the winds favoring one runway while the tower is sequencing arrivals, the lesson sticks.
A useful way to compare learning experiences is to read Aerostudies testimonials, especially if you want a better sense of pacing, instructor support, and where students tend to struggle.
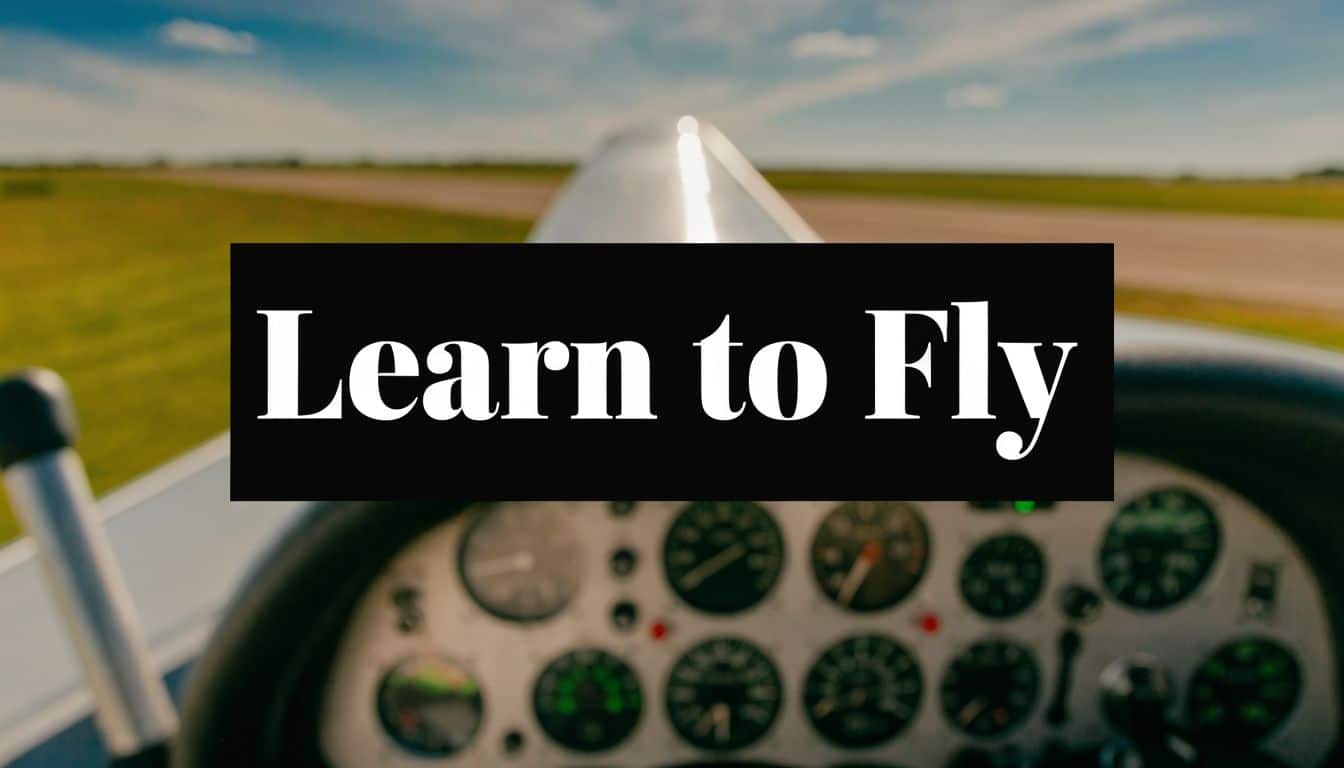
A short cockpit overview can also help connect the books to the aircraft.
Flight training follows a sequence that builds judgment
The first phase is basic aircraft control. You learn preflight inspection, taxi technique, checklist discipline, visual references, trim, climbs, descents, turns, and how to hold altitude and heading without chasing the instruments. It feels simple from the right seat. It is not simple for a new student, and rushing through it usually costs more later.
Once those basics settle in, the syllabus expands into takeoffs, landings, go-arounds, slow flight, stalls, ground reference maneuvers, simulated emergencies, and traffic pattern work. Then come solo prep, local solo operations, cross-country flights, night flying, and checkride polish.
The sequence matters because each skill supports the next one. A student who is still overloaded by trim and airspeed control will struggle with radio work and landing judgment. A student who has practiced those fundamentals enough can handle tower instructions, spacing, and pattern changes without falling behind the airplane.
Efficiency comes from training design, not from chasing the minimum
FAA minimums are only the legal floor. Proficiency is the target.
Many students need more than the minimum because training gaps create relearning, not because the tasks are impossible. The students who finish efficiently usually train consistently, arrive prepared, and use every lesson for a clear objective. Schools that pair aircraft time with simulator sessions can cut wasted airplane time, especially for checklists, radio communication flow, instrument scan basics, and scenario practice. In my experience, a sim is especially useful before towered-airport lessons and before cross-country training, because students can rehearse workload management without the Hobbs meter running.
Aircraft choice also affects progress. A well-equipped trainer with predictable handling helps a new student build repeatable habits. A technically advanced cockpit can be useful, but too much avionics too early can pull attention away from sight picture, rudder use, and energy management. The right training airplane is the one that matches the lesson and the student’s stage of development.
For a reference point on how schools structure hour requirements, Epic Flight Academy publishes private pilot training hour data. Use that as context, not as a promise. The goal is not to finish at the smallest number possible. The goal is to reach the checkride with stable skills and sound judgment.
Consistency saves hours. Repeating weak lessons adds them.
Solo and cross-country training are where students start acting like pilots
A student does not solo because one landing looked good. Solo happens when normal procedures, radio work, traffic pattern awareness, and go-around decisions are reliable enough that the instructor can trust the student to operate safely without coaching.
Training at a towered airport helps here. Students hear standard phraseology every lesson, learn how to handle sequencing, and get comfortable asking ATC for clarification. That removes a common source of stress later, especially on solo flights and cross-country trips into unfamiliar airports.
Cross-country training raises the standard again. You plan routes, compute performance, evaluate weather, manage fuel, track checkpoints, work with ATC, and make decisions when the flight does not unfold exactly as planned. That is where many students stop trying to complete maneuvers and start managing a flight from beginning to end.
A practical syllabus usually develops in phases
Aircraft control and cockpit flow
Learn sight picture, trim use, coordinated turns, climbs, descents, checklist flow, and positive aircraft control.Pattern work and landing discipline
Build consistency in airspeed, spacing, runway alignment, flare timing, crosswind correction, and go-around judgment.Abnormal and emergency procedures
Practice engine failure scenarios, lost procedures, systems awareness, and the habit of aviate, guide, communicate.Solo readiness
Tighten checklist use, radio phraseology, pattern discipline, and decision-making until the instructor no longer needs to intervene for routine tasks.Cross-country execution
Plan and fly trips beyond the local practice area while handling fuel, weather, reroutes, and time management.Checkride standards and weak-area cleanup
Refine tolerances, smooth out inconsistent maneuvers, and make performance repeatable under normal checkride pressure.
Habits that shorten the path
Students often ask what speeds training up. The answer is usually boring, and it works.
- Arrive with the lesson objective already reviewed
- Chair-fly flows, checklists, and radio calls at home
- Use a simulator for procedures and workload practice, not for showing off
- Study the local airspace, runways, hotspots, and common tower instructions
- Debrief every lesson in writing
- Fly often enough that each lesson builds on the last one
That is how a syllabus turns into progress. Safe pilots are built through repetition, honest debriefs, and training in an environment that demands precision from day one.
Your Investment in the Sky Costs and Timelines
A student who flies once every two weeks often pays twice for the same skill. The first lesson builds it. The next lesson, after a long gap, spends part of the block getting it back.
That is why private pilot license training is not just a money question. It is a scheduling question. The students who finish efficiently usually protect momentum, show up prepared, and train in an environment that keeps them sharp. At a busy towered airport like KCNO, that pace matters even more because each lesson includes real radio work, traffic sequencing, and tighter workload management. Done consistently, that pressure helps students reach proficiency sooner instead of piling hours onto the logbook.
A practical budgeting view
The cleanest budget starts with categories, not a single headline number. Schools price training differently. Some quote a wet aircraft rate and separate instructor time. Others bundle ground instruction, materials, or checkride prep. Ask for a line-by-line estimate before the first lesson so there are no surprises halfway through training.
| Expense Category | Estimated Cost Range (USD) |
|---|---|
| Aircraft rental | Varies by school and aircraft |
| Instructor fees | Varies by school and lesson structure |
| Ground school materials | Varies by provider and kit |
| Pilot supplies | Varies by headset, books, and accessories |
| Medical certificate | Varies by examiner |
| Knowledge test fee | Varies |
| Checkride fee | Varies |
National averages can be useful for setting expectations, but they do not predict your final bill very well. Real cost comes from training efficiency. Aircraft choice matters. Instructor continuity matters. Airport environment matters. A student training in a well-equipped trainer, flying regularly, and using a simulator for procedures usually spends money more efficiently than a student who trains inconsistently in a cheaper airplane but keeps repeating lessons.
That trade-off is easy to miss.
A lower hourly rate does not always mean a lower total cost. If a busy school at a towered airport produces better lesson continuity, stronger radio habits, and fewer repeat flights, the final number can be better than it first appears.
Timeline follows training rhythm
Most students do not struggle because the material is too hard. They struggle because the gaps between lessons are too long.
Analysts at Leopard Aviation note in their PPL completion timeline data that students flying several times per week can finish far faster than students who train sporadically. That lines up with what CFIs see every day. Frequent lessons preserve scan habits, radio timing, checklist flow, and landing feel. Long breaks erode all four.
For planning purposes, a realistic timeline depends on how often you can train without interruption from work, weather, maintenance, or travel. Three focused training events per week usually produce steady progress. One lesson every week or two often turns training into review.
Simulator time can help control both cost and schedule if it is used correctly. Use it for checklists, flows, radio calls, instrument reference, and airspace procedures. Do not treat it as a substitute for takeoffs, landings, or seat-of-the-pants aircraft control. Instructors who use a sim well can save aircraft time for the tasks that require the airplane.
If the budget is tight, reduce waste before reducing frequency. Study before the lesson. Show up with a clear objective. Debrief while the flight is still fresh. Then get back in the cockpit soon enough that the next hour moves you forward instead of backward.
Choosing Your Cockpit Finding the Right Flight School and Aircraft
A lot of students shop for a flight school the way they’d shop for a gym membership. They compare hourly rates, ask about scheduling, and stop there.
That’s not enough.
The school you choose shapes your habits, your confidence on the radio, your exposure to traffic, and how quickly you become useful in a real cockpit. Environment matters. Aircraft matter. Instructor fit matters. Dispatch reliability matters. If one of those breaks down, your progress usually does too.
Why the airport environment changes the quality of training
There’s a real trade off between a quiet field and a busy towered one. A quiet airport can feel less intimidating during the first few lessons. A towered field asks more of you early. You’ll work with ground, tower, sequencing, spacing, and more traffic pressure.
That extra workload often pays off.
According to training data summarized here, AOPA reports from 2025 show a 15% efficiency gain in training at towered fields versus uncontrolled ones, and NTSB data further shows student pilots training in high density environments like Chino commit 18% fewer communication errors. For a new pilot, that means real radio discipline and traffic awareness become normal instead of “advanced.”
Students who learn in busy airspace usually stop fearing radios much earlier, because radios are part of every lesson instead of a special event.
What to inspect before you commit to a school
Don’t judge a school by the front desk or the website alone. Watch how it runs.
Look for these things:
- Aircraft availability: A polished schedule means little if the training airplane is constantly down for maintenance or overbooked.
- Instructor continuity: Switching instructors repeatedly slows progress because each one teaches and debriefs a little differently.
- Maintenance culture: Ask how squawks are handled and whether aircraft discrepancies ground the airplane until resolved.
- Lesson structure: Good schools brief, fly, and debrief with a clear objective for each session.
- Scheduling reality: If you can’t get consistent slots, your timeline will drift.
A school operating at KCNO also gives you a direct look at real world controlled airport procedures. That matters if you expect to travel, rent, or eventually own an aircraft. You won’t always have the luxury of an empty pattern and relaxed radio timing.
Aircraft choice affects more than comfort
Students often ask which trainer is “easiest.” The better question is which airplane matches the stage of training and the school’s support structure.
A Piper Cherokee is a stable, familiar trainer for many students because it offers a predictable platform for basic maneuvers, pattern work, and cross country time. A Cessna 150 can be a useful simple trainer in the right operation. Transitioning later into something like a Mooney M20B exposes you to higher performance planning and different energy management, but that belongs after you’ve built fundamentals.
Simulator access also matters, especially for rehearsal. You can practice checklists, flows, radio calls, and certain procedures without burning fuel or rushing through the lesson. That doesn’t replace airplane time. It makes airplane time more productive.
One example of this training setup is DuBois Aviation, which operates at Chino Airport with one on one instruction, Jeppesen materials, an in house simulator, and a fleet that includes Piper Cherokees, a Cessna 150, a Mooney M20B, and helicopter training aircraft. That kind of environment gives students a mix of foundational trainers, realistic airspace exposure, and flexible scheduling options.
Price matters, but cheap training can be expensive
A lower hourly rate can still cost you more if the school cancels often, rotates instructors, or trains in a way that creates repeated relearning. Efficient training usually comes from a combination of reliable aircraft, solid briefs, frequent lessons, and an airport environment that forces good communication habits from the start.
If you’re comparing schools, ask one final question. “Will this place make me comfortable only at this airport, or competent in the broader system?” Choose the second one.
The Final Approach Preparing for Your Checkride
By the time you’re approaching the checkride, most of the learning is already done. The final phase is about tightening, not cramming. You’re trying to make your knowledge easier to explain and your flying more consistent under observation.
Students usually feel pressure because the checkride combines two different forms of performance. First, you sit for the oral portion and show that you understand what you’re doing and why. Then you fly and demonstrate that you can apply it.
The oral exam rewards understanding
The oral isn’t a trivia contest. Examiners want to see whether you can think like a pilot in command. If you’re asked about weather, airspace, fuel planning, or aircraft documents, they aren’t looking for polished speeches. They want sound judgment and accurate reasoning.
Good preparation usually includes:
- Reviewing your own cross country plan: Be ready to explain route, weather, alternates, fuel, and risk factors.
- Studying the aircraft paperwork: Know what documents, inspections, and limitations apply to the airplane you’ll use.
- Working scenario questions: “What would you do if…” is a common format because it reveals whether you can apply the rules.
- Answering out loud: Silent reading doesn’t build verbal clarity.
The flight test is about standards under normal pressure
In the airplane, the examiner evaluates your performance against the Airman Certification Standards. That includes technical control, procedure use, situational awareness, and decision making. Sloppy flying usually traces back to rushed setups, unstable visual references, poor trim use, or getting behind the airplane.
The best pre checkride flights aren’t dramatic. They’re clean.
A solid final preparation method
Fly a mock checkride
Have an instructor run the day like an examiner would. Start with paperwork. Brief the plan. Then fly the profile with minimal coaching.Clean up weak habits
If you always drift on altitude, rush checklist flow, or let airspeed wander in slow flight, fix that before test day.Standardize your cockpit flow
Use the same callouts, checklist method, and scan every time. Consistency lowers stress.Practice calm recovery
Small mistakes don’t automatically fail a checkride. Unsafe decisions, poor correction, or loss of composure create bigger problems.
Don’t try to impress the examiner. Fly a disciplined, ordinary flight. That’s usually what passes.
How to manage nerves without pretending they aren’t there
Almost everyone is nervous. That’s fine. Nerves are manageable when your preparation is honest.
The students who struggle most are often the ones who avoided weak areas and hoped the examiner wouldn’t notice. The students who do well usually know exactly what still needs attention and have already practiced through it. On checkride day, arrive early, bring organized documents, eat something light, and slow your pace down. Fast hands and fast speech rarely help.
A checkride is not a demand for perfection. It’s a final demonstration that you can operate safely, think clearly, and recover correctly.
Beyond the License Buying an Airplane and Next Steps
A private pilot certificate changes the question from “Can I learn to fly?” to “What kind of flying life do I want?”
For some pilots, the next step is an instrument rating. For others, it’s family trips, rental flying, or joining a club. And for plenty of new pilots, ownership enters the conversation early. That can be a smart move, but only if you buy the airplane the safe way.
How to buy an airplane the safe way
Start with mission, not emotion. A lot of expensive mistakes begin with a pilot falling in love with speed, paint, or panel upgrades before defining the actual use case.
Ask yourself:
What trips will I really take
Local sightseeing, short regional travel, longer cross country flying, mountain operations, or time building all point to different aircraft choices.How many seats do I need
Four seats on paper doesn’t always mean four adults with bags in practice.What runway and weather environment will I operate in
Performance margins matter more than brochure appeal.
Then move to the transaction side.
A safe purchase process
| Step | What to do |
|---|---|
| Define the mission | Match the airplane to real flying, not fantasy flying |
| Review logs carefully | Look for completeness, recurring issues, damage history, and maintenance quality |
| Use a reputable broker or advisor if needed | Good help can prevent expensive blind spots |
| Order an independent pre buy inspection | Use a mechanic who does not regularly maintain the seller’s airplane |
| Check ownership and paperwork | Confirm airworthiness documentation and log continuity |
| Budget for first year surprises | Assume you’ll find items that need attention after purchase |
The independent pre buy inspection is the part many buyers underestimate. It isn’t optional. It’s your chance to uncover corrosion, poor repairs, deferred maintenance, avionics issues, engine concerns, or paperwork problems before you own them. The mechanic performing that inspection should work for you, not for the seller, and ideally should know the aircraft type well.
The full cost of ownership is bigger than the purchase price
New owners often focus on acquisition and underweight the carrying costs. In reality, hangar or tie down, insurance, maintenance, database subscriptions, annual inspections, and unexpected repairs shape the actual budget.
Co ownership can be a sensible middle path. Shared ownership lowers fixed costs and can give you access to a better aircraft than you’d buy alone, but only when expectations are documented clearly. Scheduling, maintenance approval, cost sharing, and upgrade decisions should all be settled in writing before the first flight.
The same buying principles apply to helicopters
If you’re looking at helicopter ownership, the process is similar in principle. Define the mission first, use a reputable advisor when needed, insist on an independent pre buy inspection, and budget for maintenance and insurance realistically. Helicopters bring their own operating and maintenance considerations, so type specific expertise matters even more.
Your next rating should match the kind of pilot you want to become
The most useful next step for many private pilots is instrument training. It sharpens planning, weather judgment, scan discipline, and precision. Even if you don’t plan to fly professionally, it often makes you a more capable and conservative pilot.
Other pilots move toward commercial training, multi engine time, or recurrent simulator work. Some want more experience with guided fly outs, club flying, and a stronger local aviation community. That part matters. Pilots improve faster when they stay connected to other pilots, keep flying with purpose, and keep learning after the certificate is earned.
If you’re ready to start private pilot license training, continue into instrument work, or talk through aircraft ownership questions with a school that operates in the operational environment of towered airport flying, DuBois Aviation is a practical place to begin.